This page describes the steps I had to get mpich2 32bit running under Windows 7 Ultimate 64bit and also (the more challenging) how to compile MPI code and execute it with mpiexec.exe.
Various mailing list discussions on mpich2 recommend using 64bit mpich2 on Windows 64bit to avoid possible errors stemming from here. I can’t use 64bit though, because I need to connect it to a 32bit Ubuntu mpich2.
To install mpich2, you just need to download the latest version from mpich2 website and install it on your system.
PS: I’ve tried compiling it, but since I don’t like cygwin at all (I appreciate the effort, but I had cases in the past where the UUIDs messed up my external HDD when I’ve attempted to access folders on different PC; it also adds so many files to the filesystem (back in the days I counted >100.000) that made searching the whole disk (antivirus / looking for .docs) almost unbearable.
I’ve attempted to compile mpich2 using Visual C++ Studio 2010 Express Edition (~1CD download) but it lacks the ATL library and headers which are present only in the paid version. However ATL headers / libs come with the Microsoft Platform SDK 2003 (another ~1CD worth of downloads). Even with this, I still encountered problems when compiling. There are many .bat files and I did not have the time to understand which one to run (seems that the winbuild/build.bat took me the furthest).
Plus, compared to the speed of compiling it on Ubuntu, the Windows one took a lot more time, and eventually exit with errors. I thus uninstalled all Visual C++ things / PSDK / HPC 2008 pack and used the mpich2 already compiled version.
My setup is like this:
- latest mingw suite (comes with gcc 4.5.0 at this moment)
- Download the latest installer from http://sourceforge.net/projects/mingw/files/Automated%20MinGW%20Installer/.
- Few clicks layter, on the “Select Components” window, please check the the C++ compiler too.
- MSys (just the base files)
- Download the latest installer MSYS-1.0.10.exe
- Install it
- Copy the X:\msys\1.0\bin\make.exe file inside mingw X:\mingw\bin folder.
- Netbeans 6.8
- Download from http://netbeans.org
- Set it up according to http://netbeans.org/community/releases/68/cpp-setup-instructions.html
I’ve found various pages online saying that the mingw32-make.exe is not that good, and that the make.exe coming with msys is OK for compiling. Netbeans itself warns against this (not supporting the mingw32-make.exe).
Related to which IDE to choose, I first tried to get DevCpp to work, but it was difficult. I had to download the latest devcpp-4.9.9.2_nomingw_setup.exe executable only (without mingw). The reason is that DevCpp comes bundled with very old gcc (3.4 I think) and linking with mpich2 libs produce errors like undefined reference to `__gxx_personality_v0 or initcxx.cxx: undefined reference to `_Unwind_Resume'. And then, even if you add mingw to PATH, DevCpp tries to run mingw32-make.exe, but with arguments –v (which, in the old mingw, produce a version number). This argument doesn’t work anymore in the latest mingw (-v needs to be used), thus you always get errors at DevCpp startup that it was unable to detect the GNU make in the PATH. It is in the path. You should place msys make.exe in the path (that accepts the –v argument), and get it to work like this.
I thus settled on Netbeans IDE. I also believe Eclipse works, as long as mingw32 is used along with make.exe from msys.
There are other things to do/remember you can compile and run MPI program:
- In mpich2 v1.3.2, there are two 0 length files in the \lib folder (libfmpich2g.a and libmpi.a). I’ve moved them to a \lib\empty\ folder, out of sight. They create issues if you try to link against them, as the linker will complain that the files are truncated.
- You need to link statically. This is true for DevCpp and other maybe. The trouble is that when SMPD (mpich2 Process Manager) runs as a service on Windows, somehow you don’t get the warnings that .dll files are missing. To get them you need to stop the service and start smpd in debug mode: smpd.exe -debug
- There is a difference between mpich2 pass-phrase that you get when you install mpich2, and the Username / Password combination that you have to register afterwords. The pass-phrase is used when two SMPD processes (on two different machines) communicate. The user/password combination is used when SMPD executes your MPI processes locally.
- To install SMPD as service, you either allow it when you install, or you install it afterwards with smpd.exe -install (which also starts it). You need to have SMPD running to be able to execute MPI processes.
- You need to register your username / password combination in the registry. For this you use mpiexec.exe -register and answer the questions. To make sure everything works so far, just try mpiexec.exe -validate and you should get SUCCESS
Take for example the code below:
#include#include int main( int argc, char * argv[ ] ) { int processId; /* rank of process */ int noProcesses; /* number of processes */ int nameSize; /* length of name */ char computerName[MPI_MAX_PROCESSOR_NAME]; MPI_Init(&argc, &argv); MPI_Comm_size(MPI_COMM_WORLD, &noProcesses); MPI_Comm_rank(MPI_COMM_WORLD, &processId); MPI_Get_processor_name(computerName, &nameSize); fprintf(stderr,"Hello from process %d on %s\n", processId, computerName); MPI_Finalize( ); return 0; }
The steps to compile it:
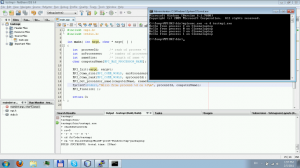
- File / New Project … / C/C++ Aplication, name it and go with defaults
- Replace content of main.cpp with the code above.
- Rightclick on project name on the left, select Properties:
- Categories / Build / C++ Compiler -> Include directories add value C:/Program Files (x86)/MPICH2/include
- Categories / Build / Linker -> Additional Library Directories add C:/Program Files (x86)/MPICH2/lib
- Categories / Build / Linker -> Libraries click “Add Option” and select “Static Bindings” (will add flag -static to the linker)
- Categories / Build / Linker -> Add Library … and select one by one, all .lib files from C:/Program Files (x86)/MPICH2/lib
Then compile it and build it, and everything should work ok.
To run:
Locate the .exe file within the dist/ folder of the Project and issue:
mpiexec -n 4 testmpi.exe
If everything went OK you should see:
Microsoft Windows [Version 6.1.7600]
Copyright (c) 2009 Microsoft Corporation.  All rights reserved.

C:\Program Files (x86)\MPICH2\bin>mpiexec.exe -n 4 testmpi.exe
Hello from process 1 on Cinemalaptop
Hello from process 3 on Cinemalaptop
Hello from process 2 on Cinemalaptop
Hello from process 0 on Cinemalaptop

C:\Program Files (x86)\MPICH2\bin>
That’s it!


Anuj
Hey thanks for this tutorial. Can you also please tell what steps to follow while doing the same thing on Eclipse. Where to make the above changes and how to run the code.
Thanks