


The Adafruit Huzzah esp8266 is too power hungry to be used by itself on battery (batteries). This blog is a summary of my attempts to get it to run as long as possible in a real world scenario: periodically send sensor data + battery voltage to my MariaDB SQL server.
The choice of the board was easy, since I like to have charts and automated notifications … Atmel / Arduino are too weak for this, Grafana added support for MySQL, so I decided to give it a go.
The project did not start well since I soon discovered that the board is very power hungry.
Problems:
- There is no mention on the official Adafruit page https://learn.adafruit.com/adafruit-feather-huzzah-esp8266/power-management about the during sleep mode power consumption of the board.
- After skimming through many support topics (such as this one: https://forums.adafruit.com/viewtopic.php?f=8&t=120675 where deep sleep power draw of the Adafruit Feather HUZZAH is shown to be around 6.5mA) the culprits are pointed out by adafruit_support_mike : “There’s also a CP2104 USB-to-Serial converter, the voltage regulator, the LiPo charger, and all the support passives like pull-up resistors. The ESP8266 doesn’t have any control over those, and they weren’t designed for low-power operation.”
- One blog give high hopes on “How to run an ESP8266 for years on a battery” ( https://openhomeautomation.net/esp8266-battery/ for SparkFun ESP8266 Thing). The correct title should have been “How to sleep your ESP8266 for years on a battery” since the claim only relies on the deep sleep current draw AFTER you have to physically cut a trace / desolder the “on” LED. The code given as example is taking a measurement and uploading it every 10 seconds, but that power consumption is completely ignored in the estimation.
- Out of desperation (or challenged by) these development boards – some people even had to cut / rewire the traces of the circuit to be able to bring down the power consumption: https://tinker.yeoman.com.au/2016/05/29/running-nodemcu-on-a-battery-esp8266-low-power-consumption-revisited/
Okeeey …
Searching for a solution – the cleanest one I found was presented here: http://homecircuits.eu/blog/battery-powered-esp8266-iot-logger/. It uses an atTinyXX Atmel CPU + an N-Channel Mosfet – the ESP8266 development board is powered for 8s only. 8s gives enough time to make the measurement and upload data via WIFI but since I wanted to measure every 5 minutes to do the comparison, I had to modify the source code from the link above so that it only sleeps closer to 5 minutes, instead of 20m.
I’ve also studied the board to see if cutting the power to the USB-To-Serial chip (white trace below) would make a difference but the solution looks too aggressive :
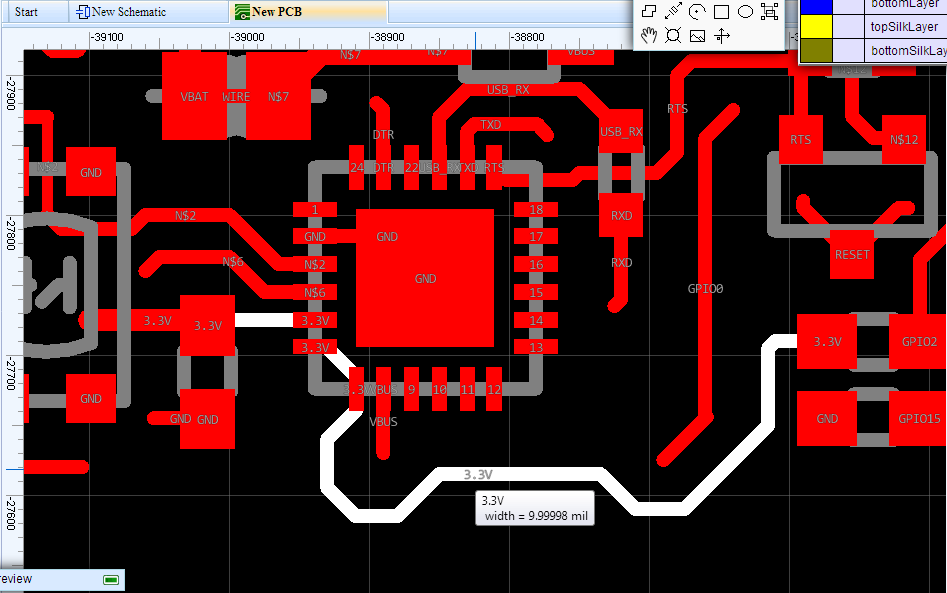
Capture from https://easyeda.com/ – previewing the Arduino Feather Huzzah board.
I’ve decide to test the setup in few ways:
- No sleep, measurement and upload every 5 seconds.
- Deep sleep, measurement and upload every 5 minutes (300 seconds).
- External power control, measurement and upload every 5 minutes and 44 seconds (344 seconds).
Results:
All charts were shifted to start on Sept 1 and then layered:
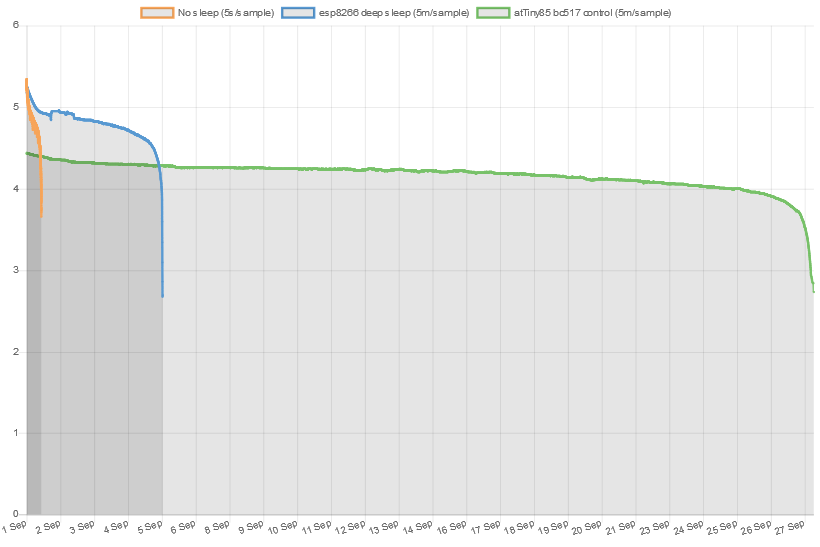
Battery Voltage over Time
Observations:
- Since I had no Mosfet at hand, I had to use a Darlington transistor, BC517. This has a Vce(sat) of around 1V, so the Voltage that is seen by the circuit is approx. 1V less than what the batteries provide. The BC517 has hFE(sat) of 1000 and allows a collector current of 400mA providing IB(sat) to be 400uA (which the atTiny85 can provide).
- Beside the Feather Huzzah, the circuit included an INA219 voltage/current sensor and a BMP180 barometric pressure/temperature/altitude sensor. Although the ESP8266 has a pin for an analog to digital converter that could be used to measure battery voltage, I need the pin for a different sensor I plan to connect to the board – thus, I had to use the INA219 to measure battery voltage. So the power consumption of the board is closer to reality that measuring just the circuit when nothing happens.
- The batteries used were 4 x AAA Camelion 1000mAh batteries connected in series. The equivalent of a 5.3V 1000mAh battery when fully charged.
- There is a huge difference between just allowing the Feather Huzzah board to sleep (4days) and cutting the power completely (transistor decouples the GND of the board from the real GND) which allowed 27 days on the battery. Noticed no problems related to WI-FI stability because of floating GND.
- The controlling atTiny85 had its ADC disabled, to save power when it also sleeps. It consumes almost nothing when it goes to deep sleep (probably 5uA).
Consumption:
The circuit stopped working after 646h and 22m (646.37h) which is approx 26.5 days.
The average load current is: the battery charge of 1000mAh divided by the time it took to deplete it (646.37h) that is about 1.547mA.
Each cycle of ON/OFF of the Feather Huzzah was 344s (out of which 8s was ON, and the remaining 336s was off with only the atTiny85 sleeping). If the current consumed by the atTiny is negligible compared to the current consumed by the whole circuit when ON, then the charge consumed in the 8 seconds but distributed over 344s would produce the average load current:
I(huzzahon) * 8s = I(avg) * 344s -> I(huzzah) = 1.5471mA * 344s / 8s ~= 66.5mA
Conclusion:
I could not run a simple circuit for years on a battery, only for 26 days and a half using more external components to physically cut off the current going to the Feather Huzzah board. Just deep sleeping the Huzzah board every 5 minutes depleted the batteries in 4 days!
Right now there are two more possibilities to extend the duration of the batteries. One is to use much larger batteries. Another one is to use a fixed IP for the board as it seems most of the WiFi connection time is spent on DHCP, but this is yet to be tried.
Photos:
-
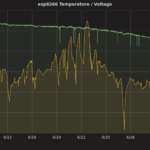
- Grafana charts
-
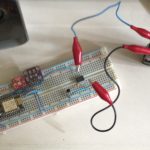
- Circuit in action.
-
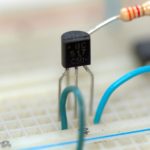
- BC517
-
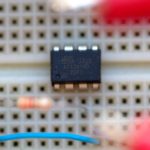
- atTiny85
-
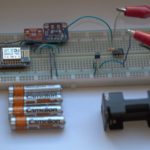
- Batteries
Brian
I’m running my weather station at 20 micro amps (not milliamps) in “sleep” mode. That’s 3x better than the “deepsleep” of the ESP8266 if everything is working perfectly and you have nothing else connected.
I just connected a $1 RTC DS3231 (Amazon), and NPN Transistor, three resistors and RTCLib with a dash of extra code to use the alarm feature.
The Huzzah Feather draws a ton of current even in the ESP’s deepsleep, like others have said I saw 6.5mA instead of 60uA. This doesn’t matter though because I’m turning the whole board off via the Enable pin to get down to my 20 microamps.
Here’s the setup…
1) Replace the 10k pull-up resistor on the huzzah’s Enable pin (R7) with a 240k. Sounds hard, it’s easy.
2) Wire a GPIO to the Collect on the NPN transistor.
3) Connect the Alarm pin to the Base pin of the NPN transistor. Then add a 240k resistor from that pin to VBUS (labeled USB pin on board). …Resistor nessesary because alarm pin doesn’t source it’s own current.
4) Connect the Emit pin of the NPN transistor to the Enable pin on the Huzzah Feather. Add two 40K resistors (in parallel) to ground (or maybe just use one 20K but this is what I did).
Boom. This also allows the Huzzah Feather to charge my battery via the solar panel while it’s sleeping. I added a diode in-line on my solar panels V+ because it drew current (that’s connected to the pin labeled USB on the Huzzah Feather).
Note: This would have been way more simple except the RTC’s alarm pin goes high when I need it to go low :/ The NPN inverts this for me.