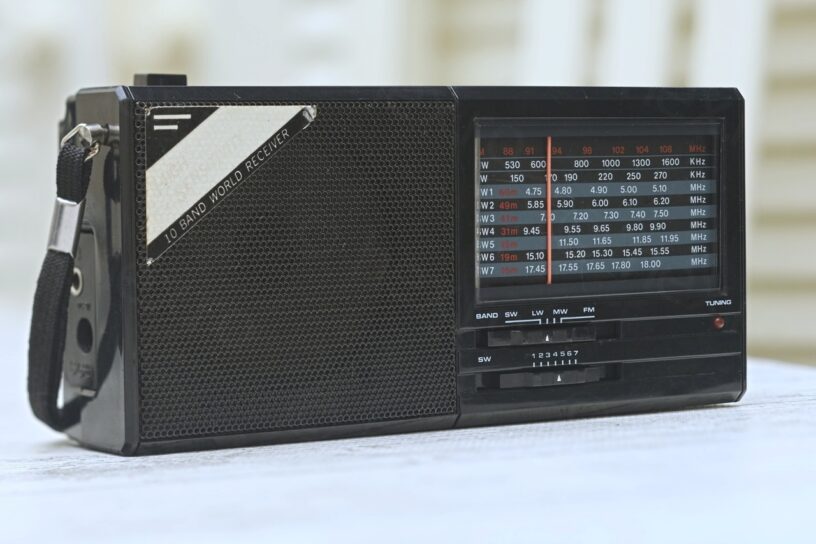


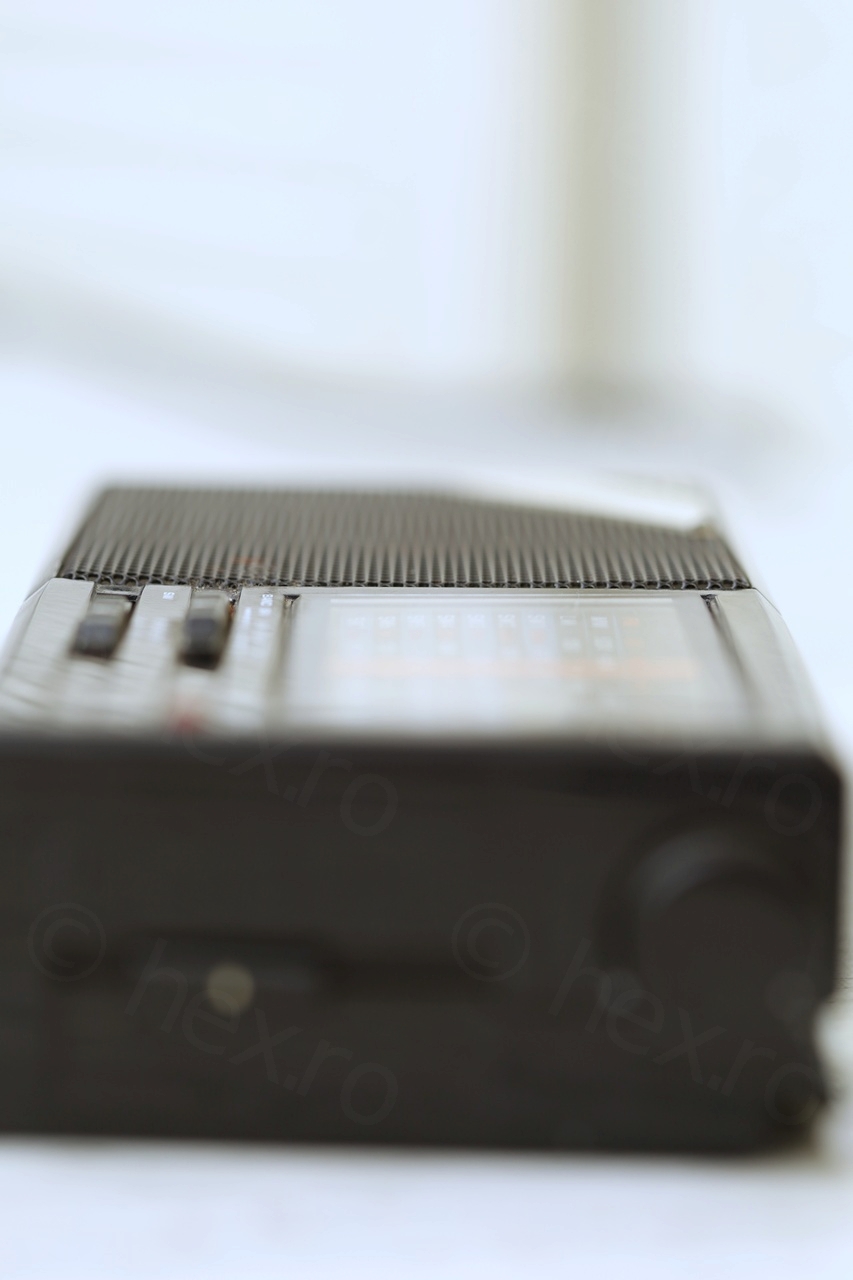
Seeing this radio at the local flea-market triggered a wave of nostalgia …
I had a similar one when I was a teenager – called “PANSONIC” (yes, the A was missing). Got it as a reward for achieving good results at the National Physics Olympiad but was stolen when I was in college. Except its name, the only things I remember are a specific smell it had and the logo mentioning “9-band world receiver”.
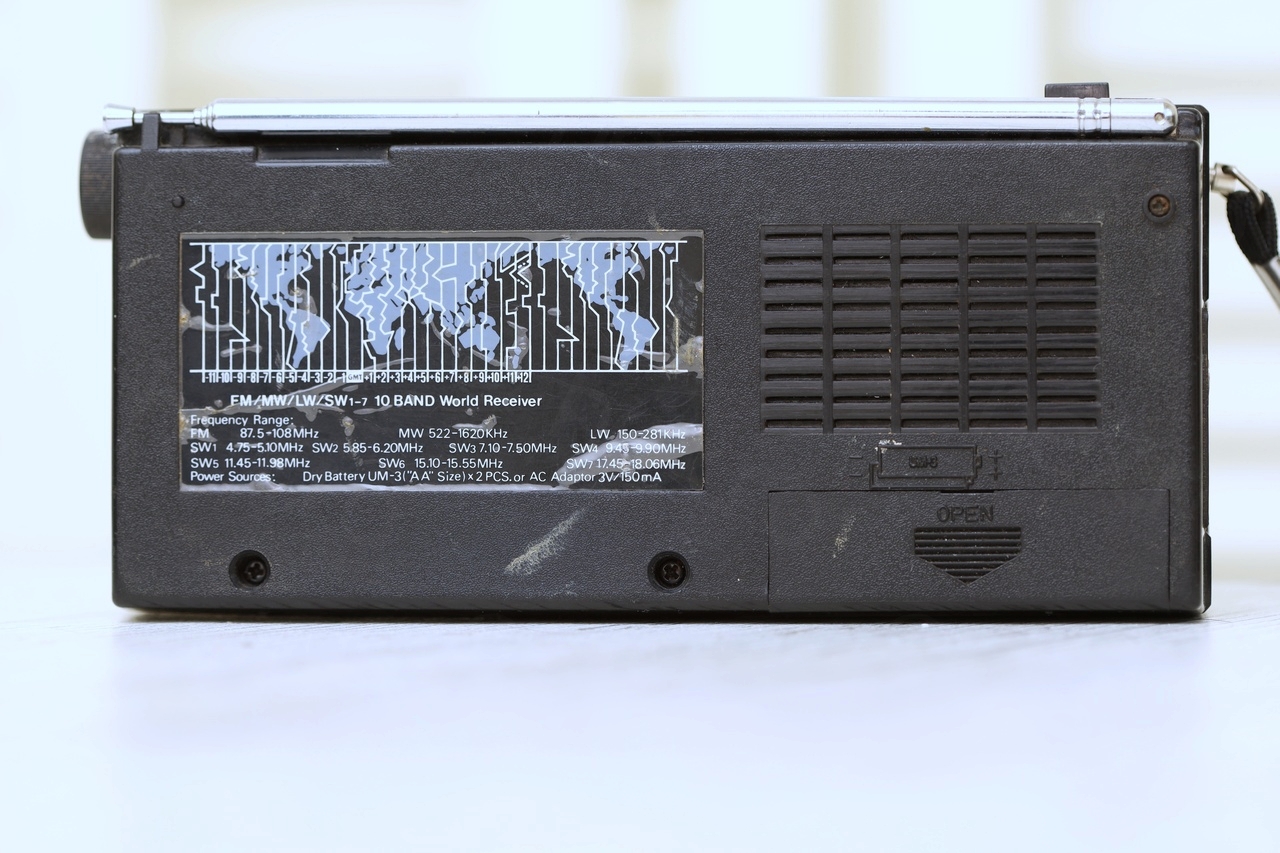
I did search the internet for “9-band world receiver” few years after, just to land on an identical looking model but named differently. The radio-museum.org site mentions that there are other clones out there, all copying a “Sangean SG-792AL” initial model.
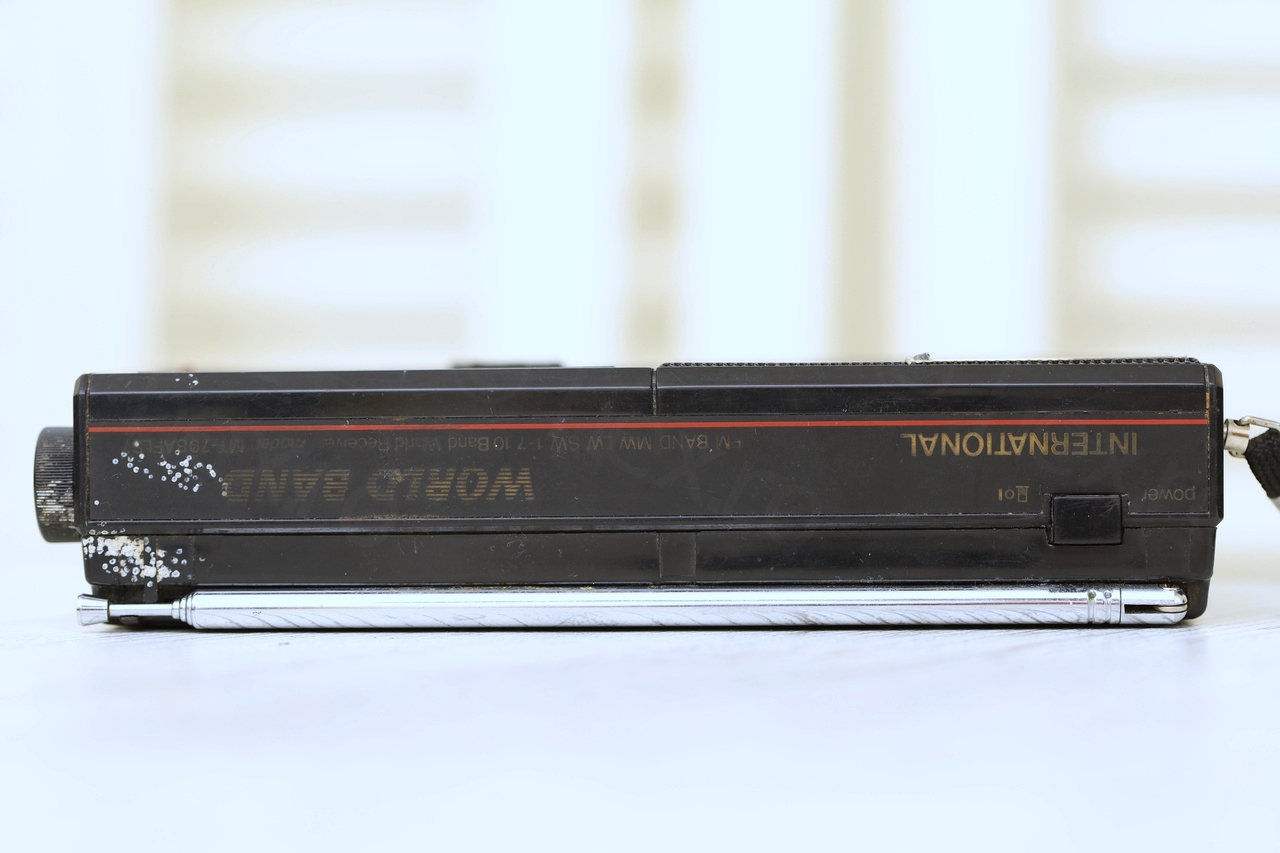
It seems Radio International MT-798AFLS7 falls into the same category. Found it in a very very poor shape at the local flea-market, but the price was right – almost nothing. Got it to try to restore it.
Evaluation


The radio had all the bits and pieces (the things I look for is that original antenna is present, battery cover and the knobs). But this is where the good things ended.
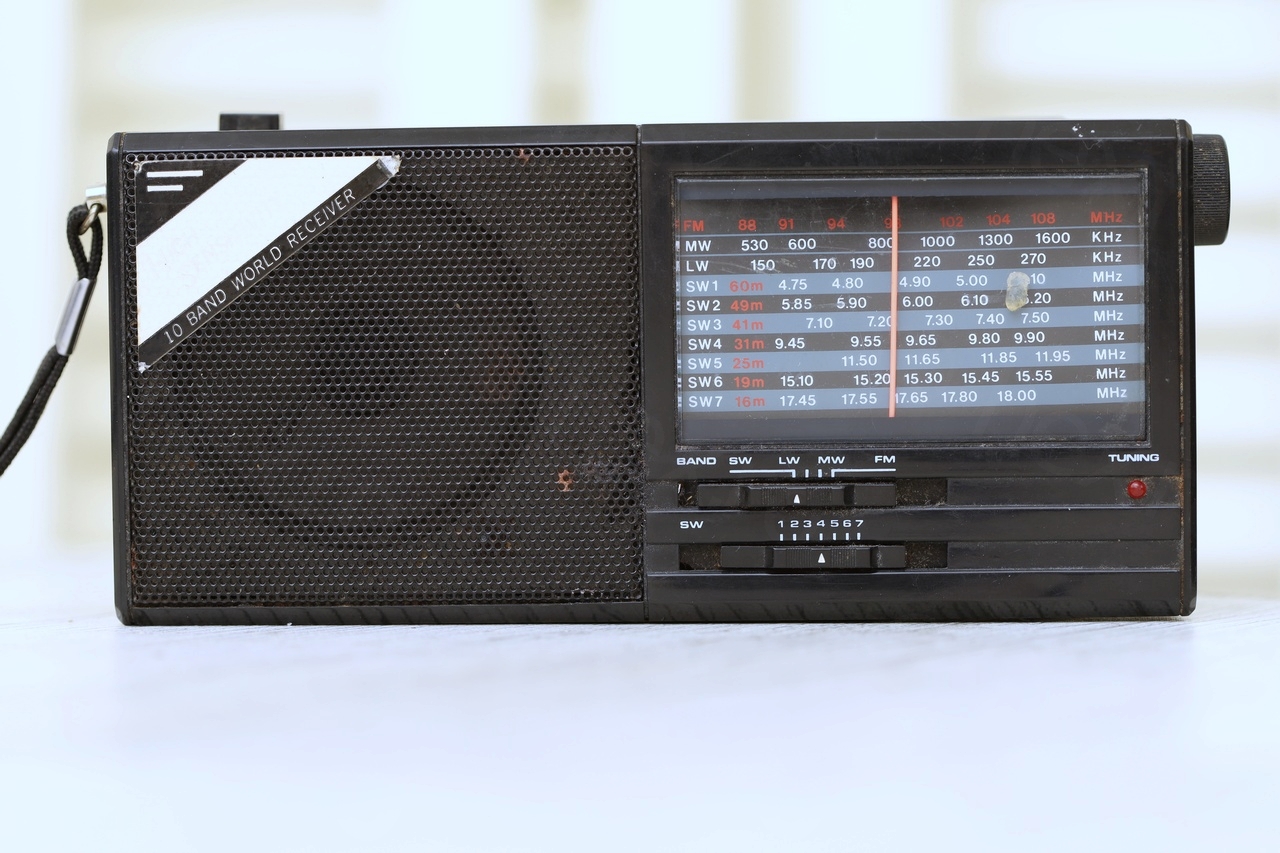
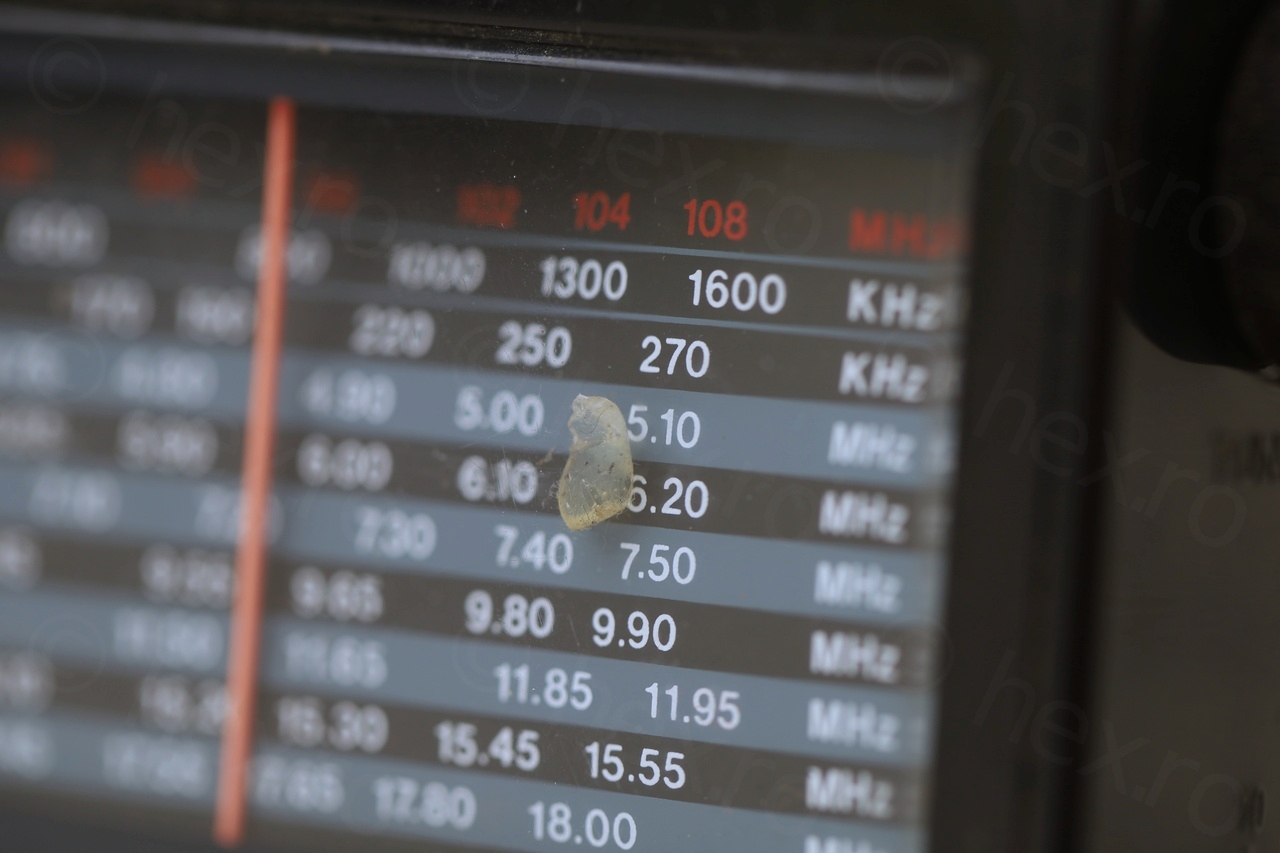
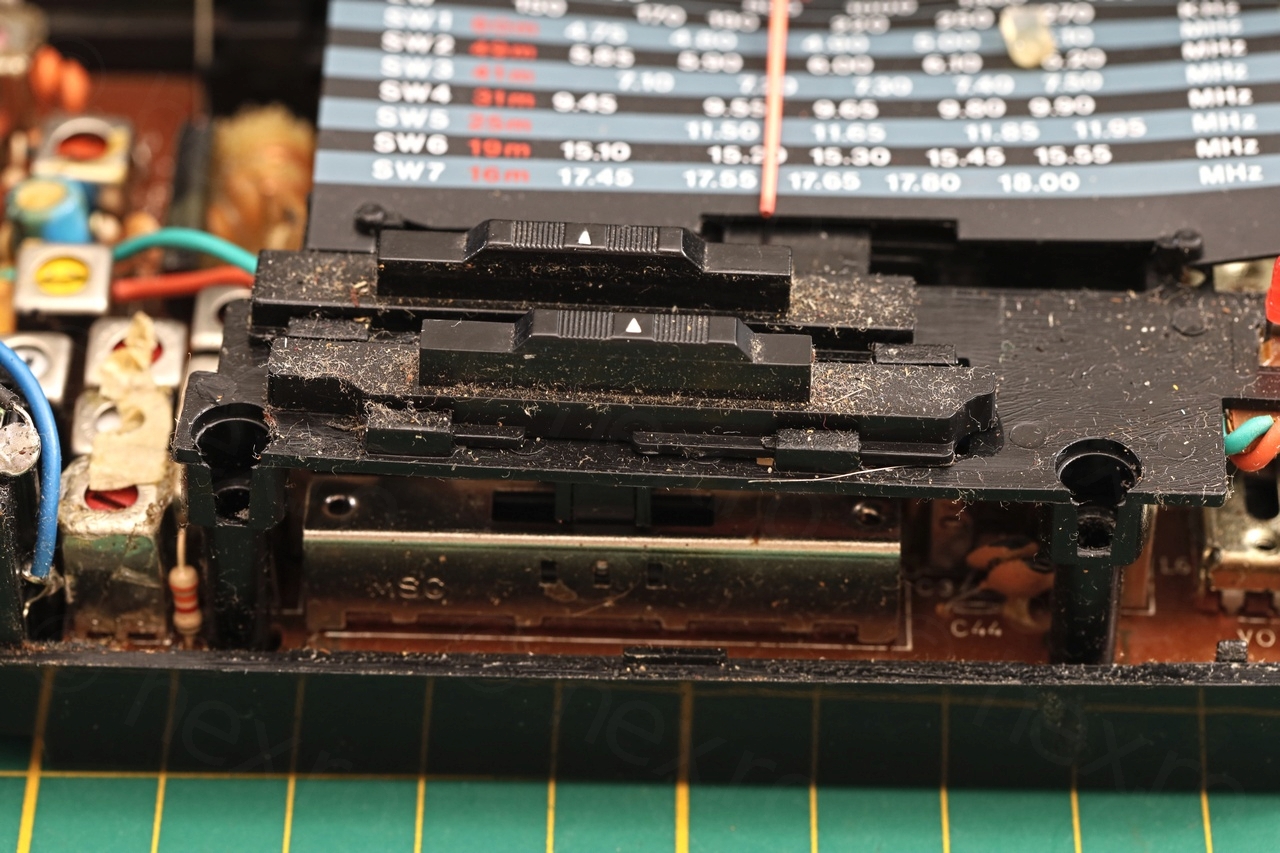
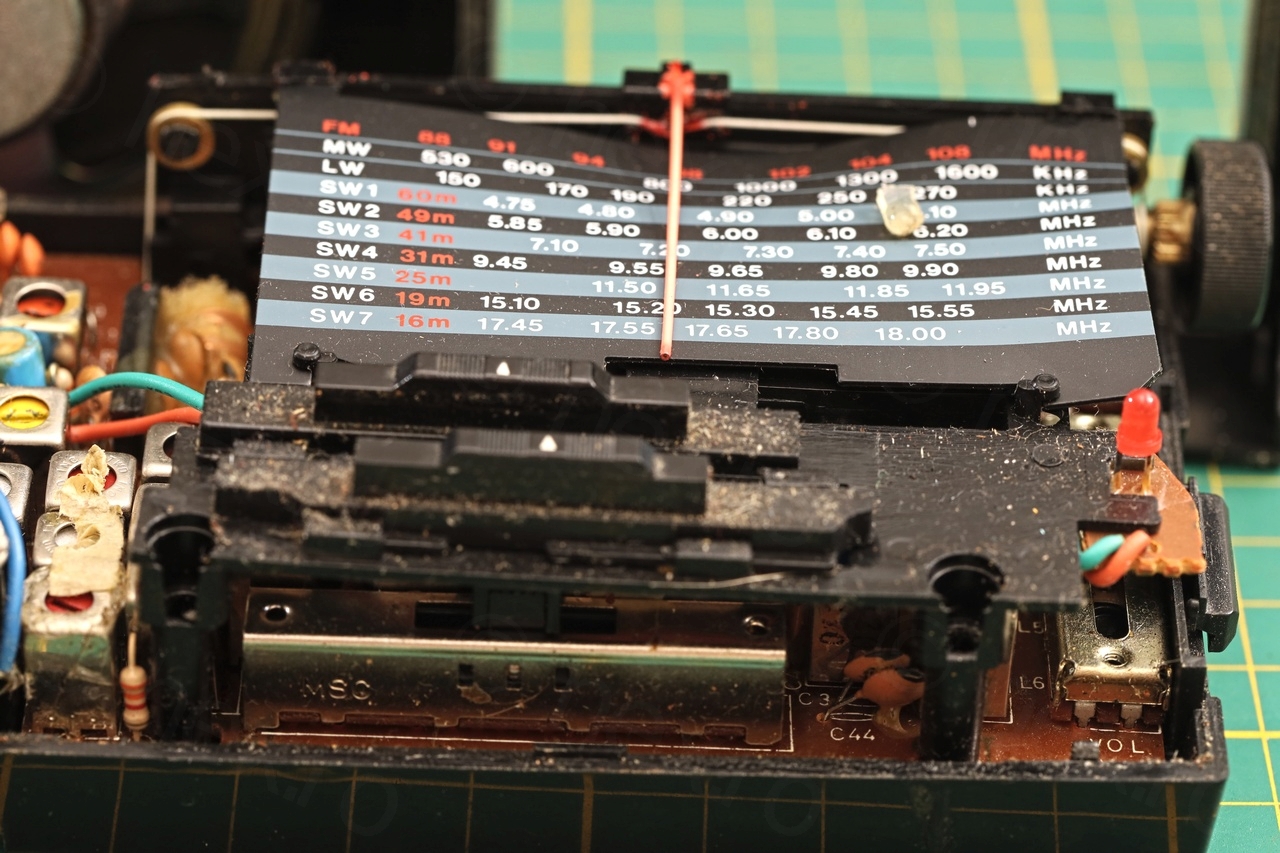
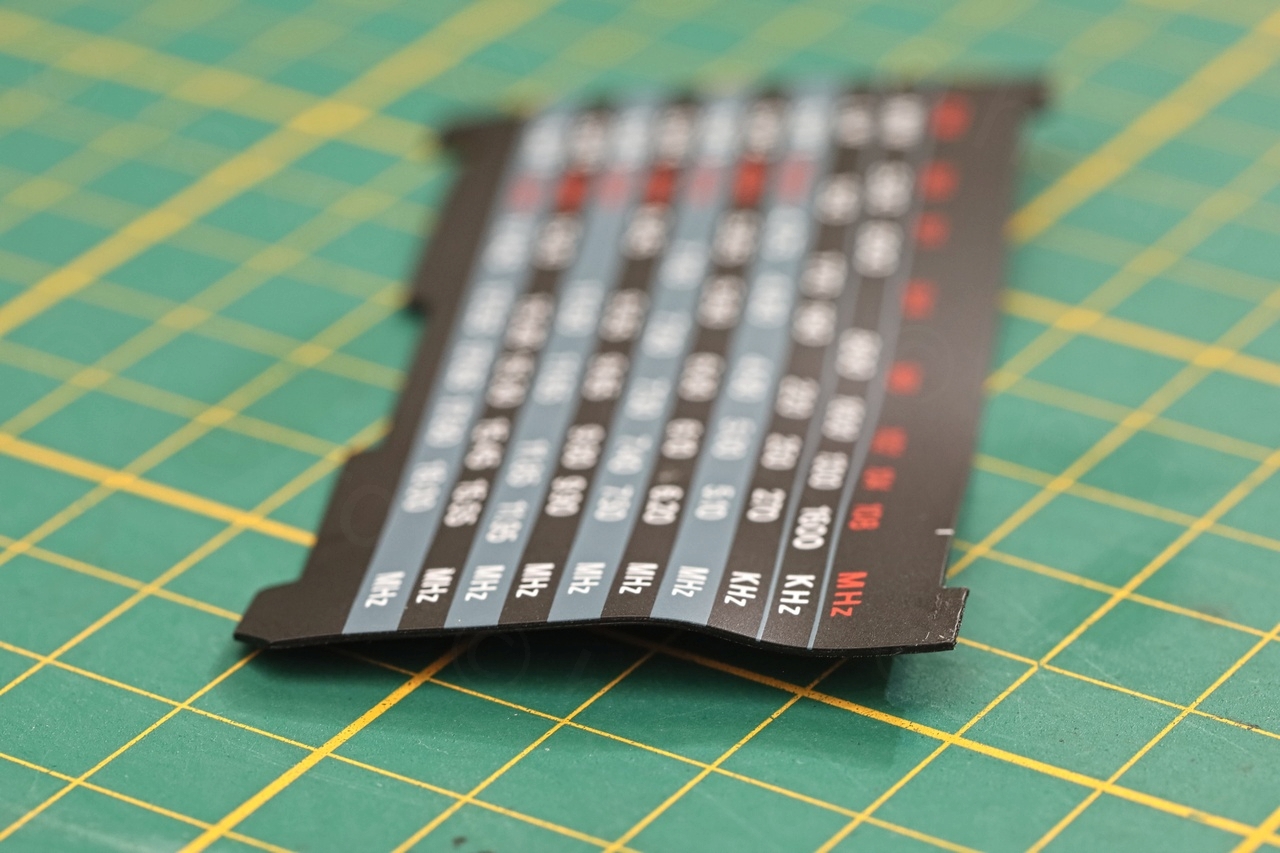
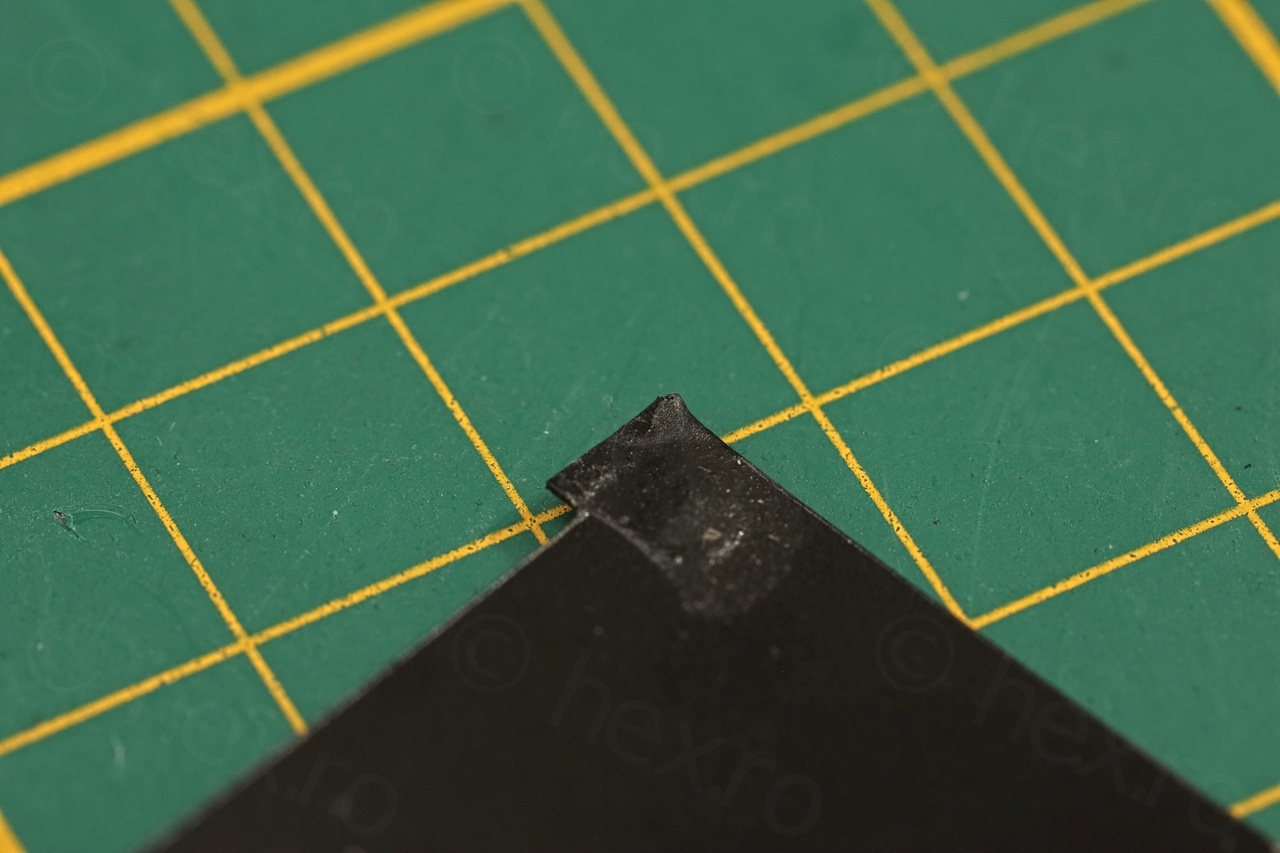
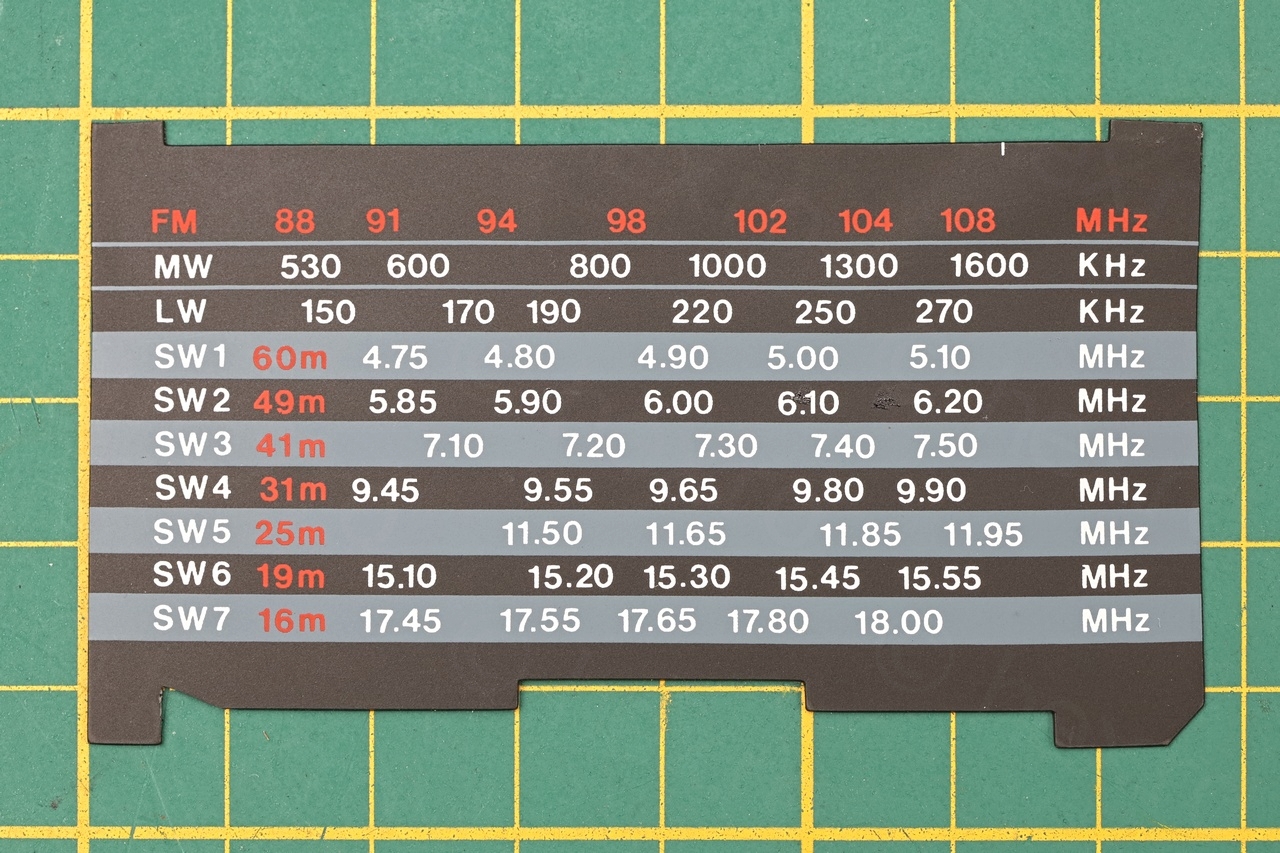
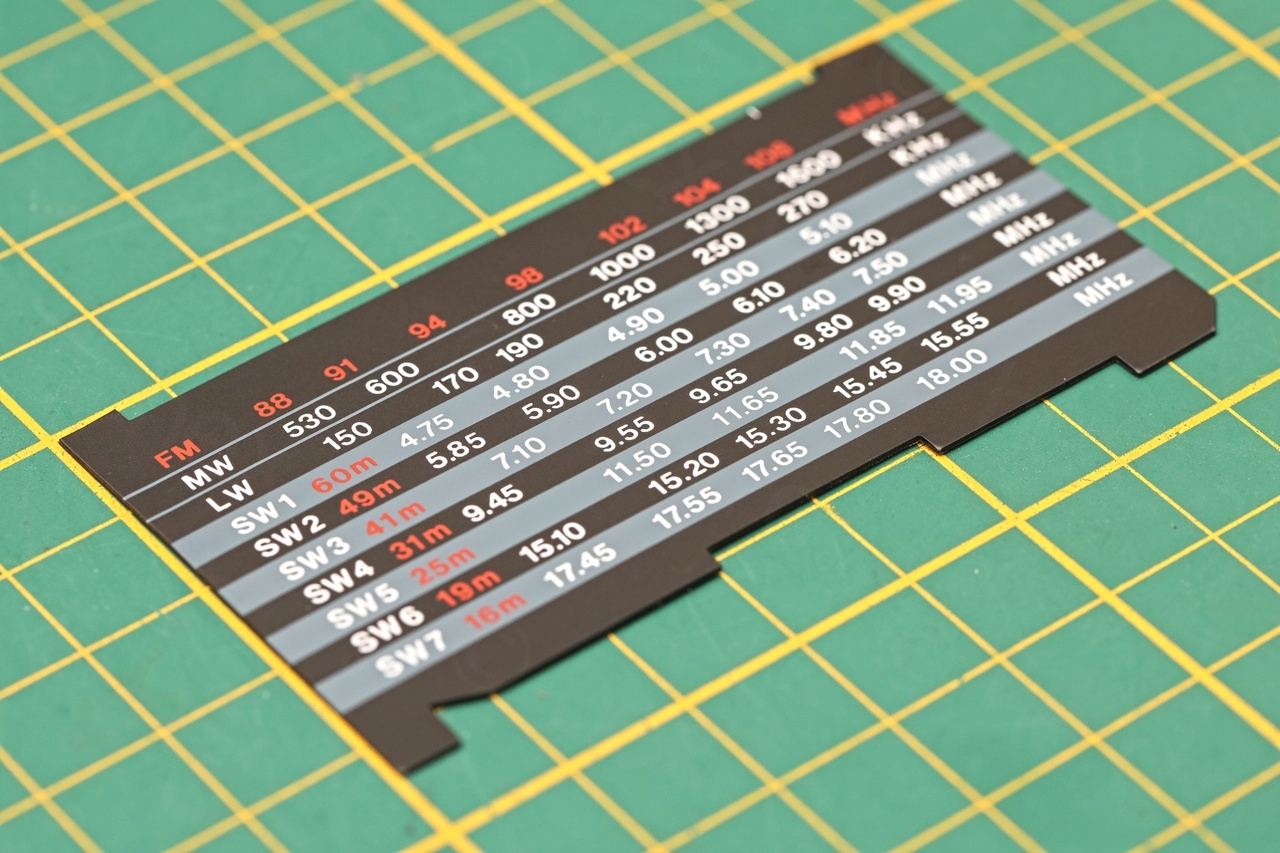
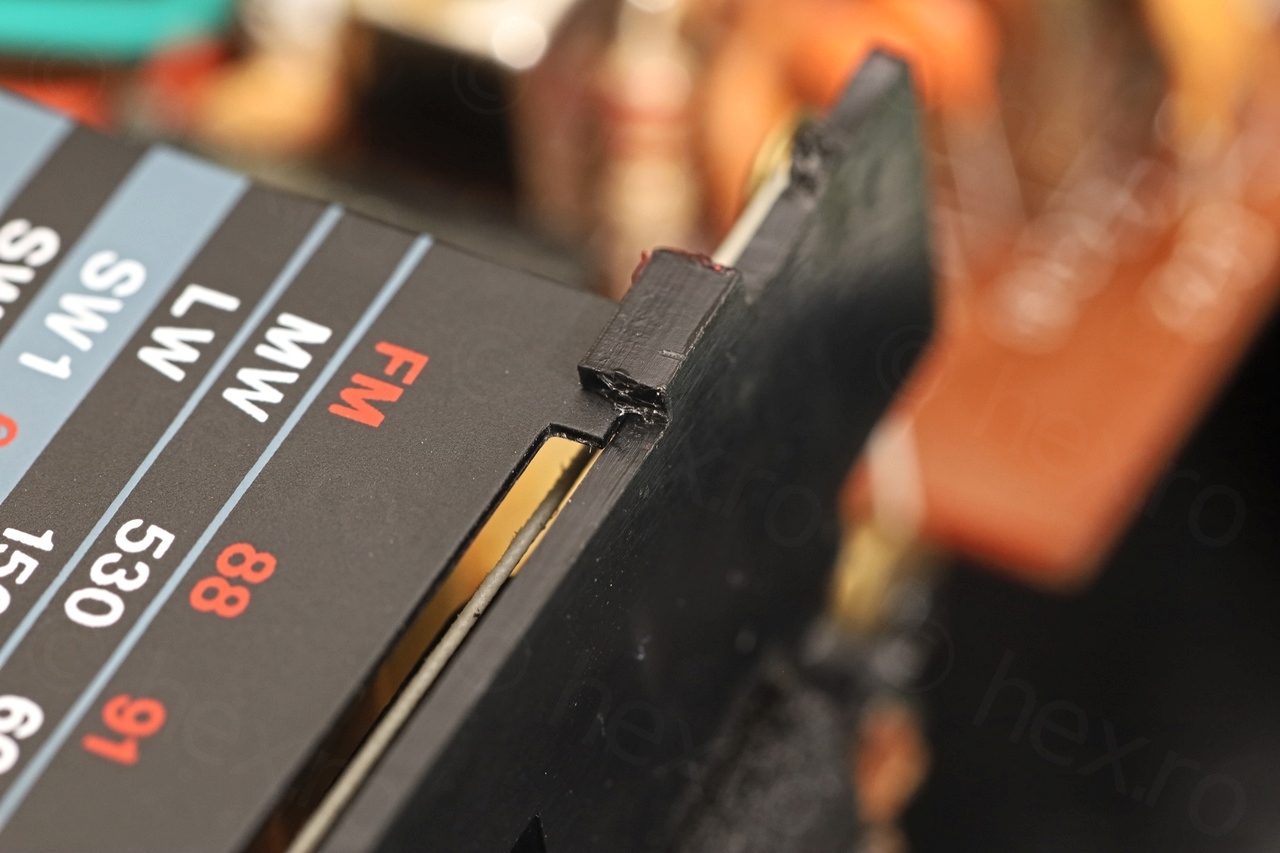
The dial face was deformed. A glob of hot glue was jammed inside between the glass and the dial scale – a sign that somebody was already inside the radio trying to mend things.
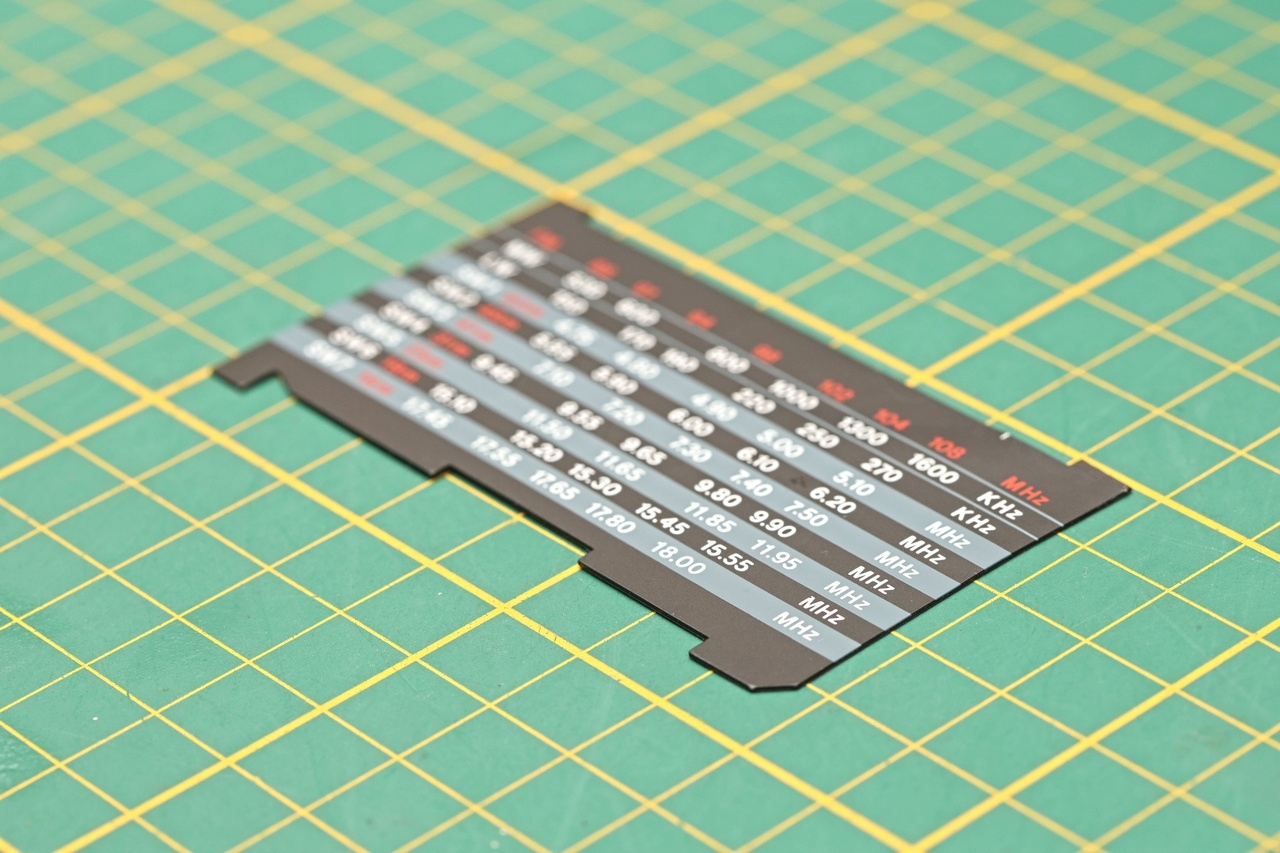
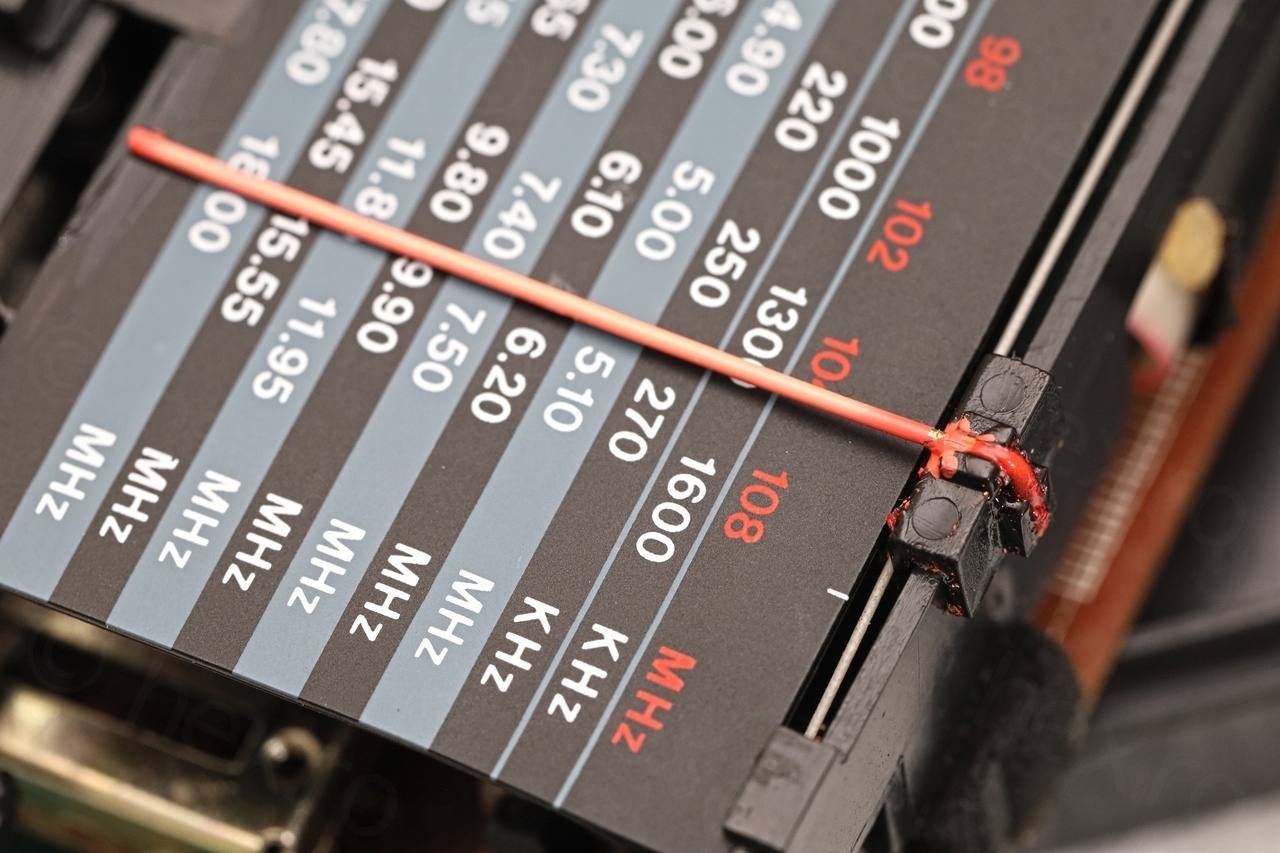
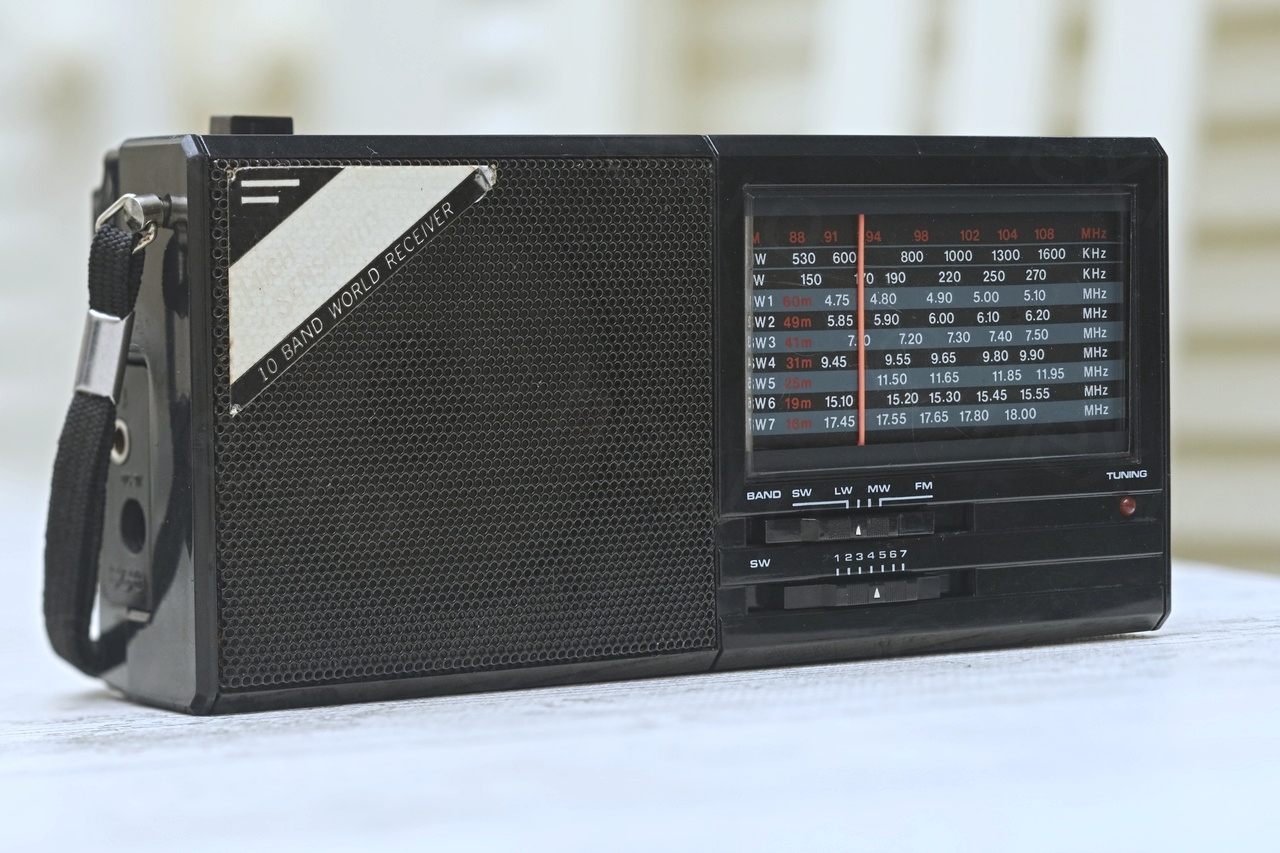
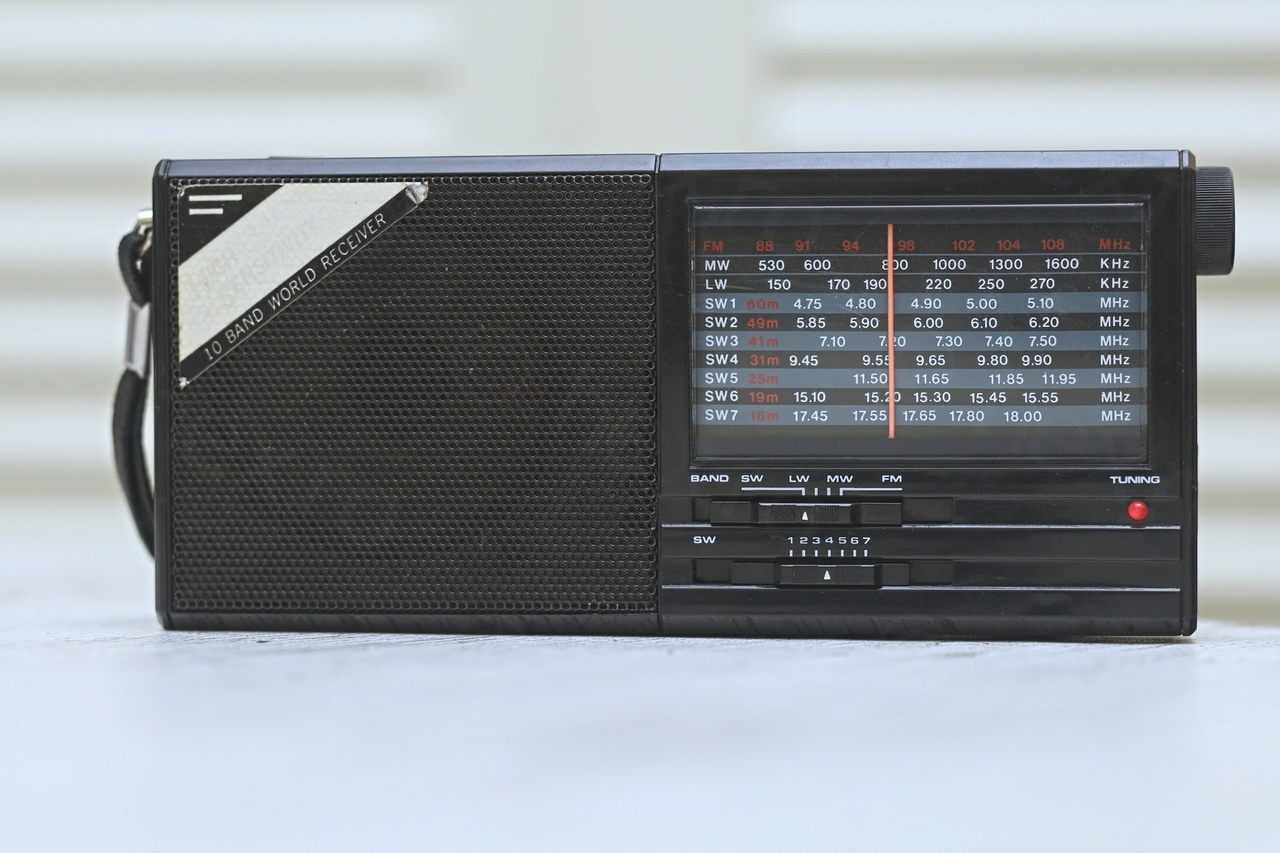
Visually, this radio has all the tale-tell signs to have been exposed to Sunlight (or an constant source of intense heat). The plastic didn’t have any marks of being pushed in / touched / cracked, it looked just deformed because of heat. The most painful to look at though was the dial scale. The top left sticker should have been red – as well as the dial pointer, but the sticker is white and barely readable and the dial pointer is orange.
Time for some tests – I popped 2 x AA batteries in and (loud scratches, please mind the volume):
The radio did not receive anything. While initially I kept thinking how I could remedy the plastic deformation of the dial scale, now it became more important to fix the radio so that it can receive, otherwise … there would be no point in fixing the visual aspects. The blob of hot glue is visible also in the video (center right) – that is the reason I was not turning tuning to the right hand side of the scale.
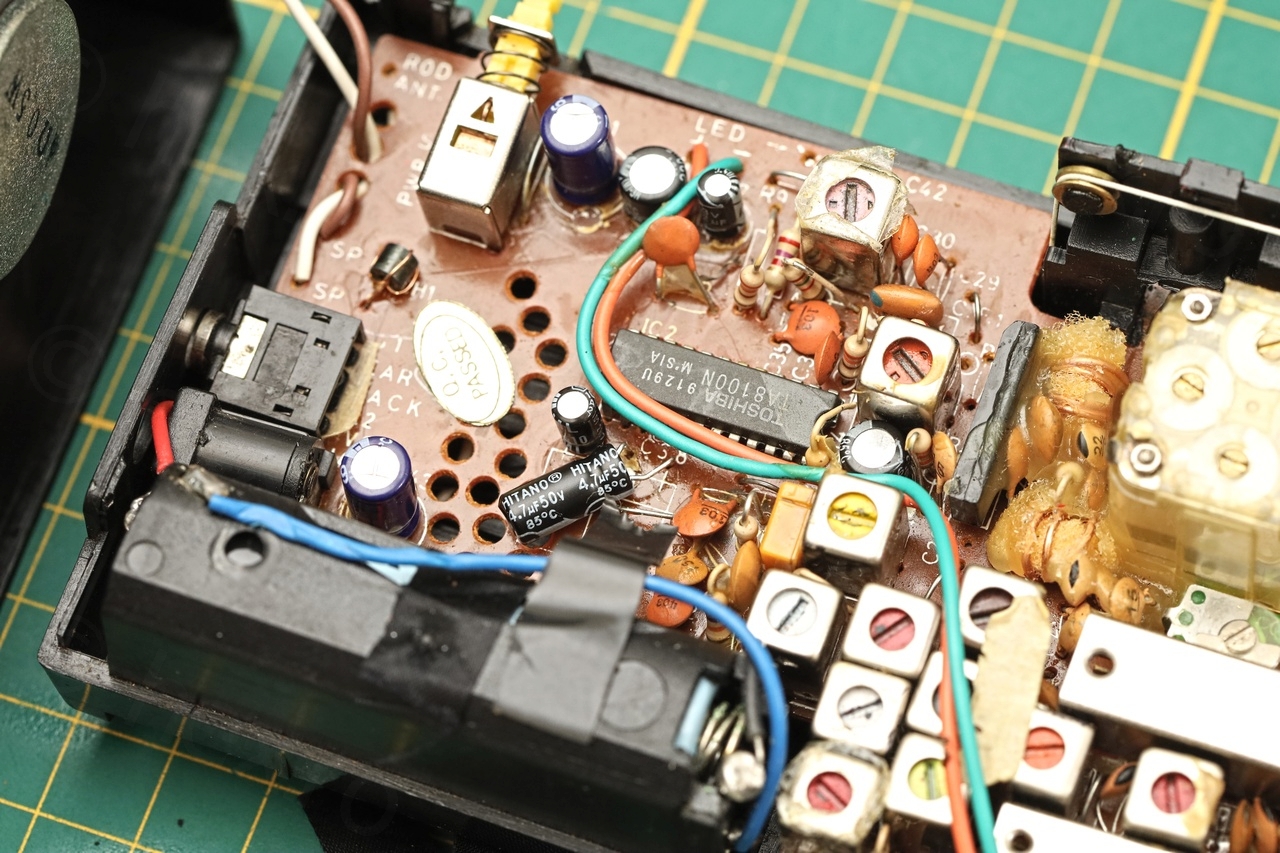
Opening up the Radio
Taking it apart is simple, on the bottom side there are 3 screws – 2 long ones and a short one inside the battery compartment. Then the case can be lifted from that side, tilting it towards the top – as the top has some small latches that hold it in place.
While taking the radio apart, I noticed few more problems.
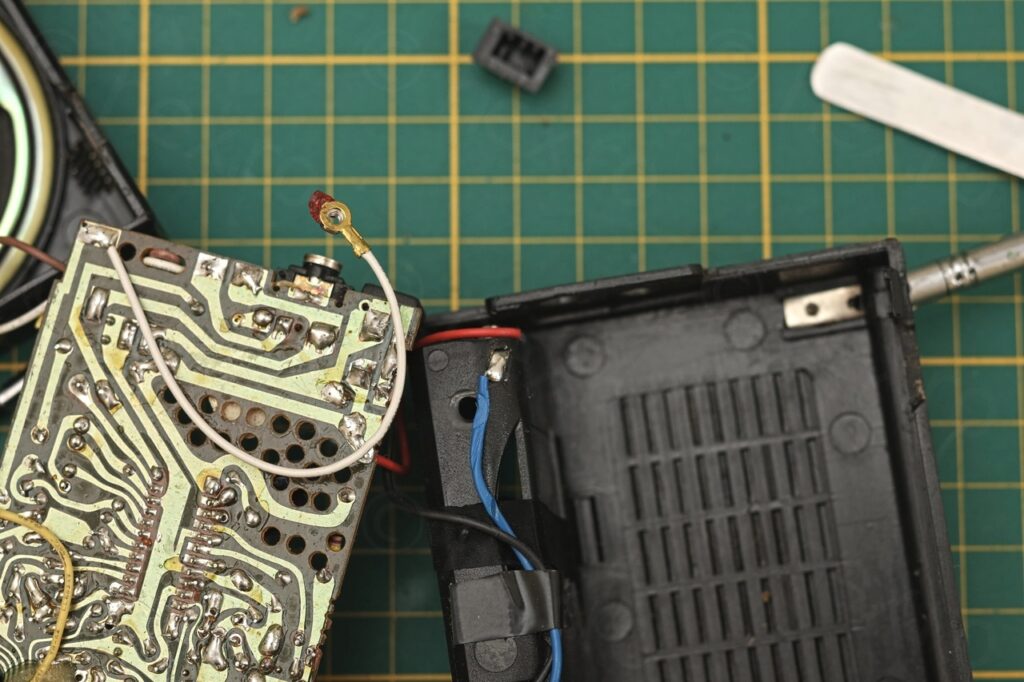
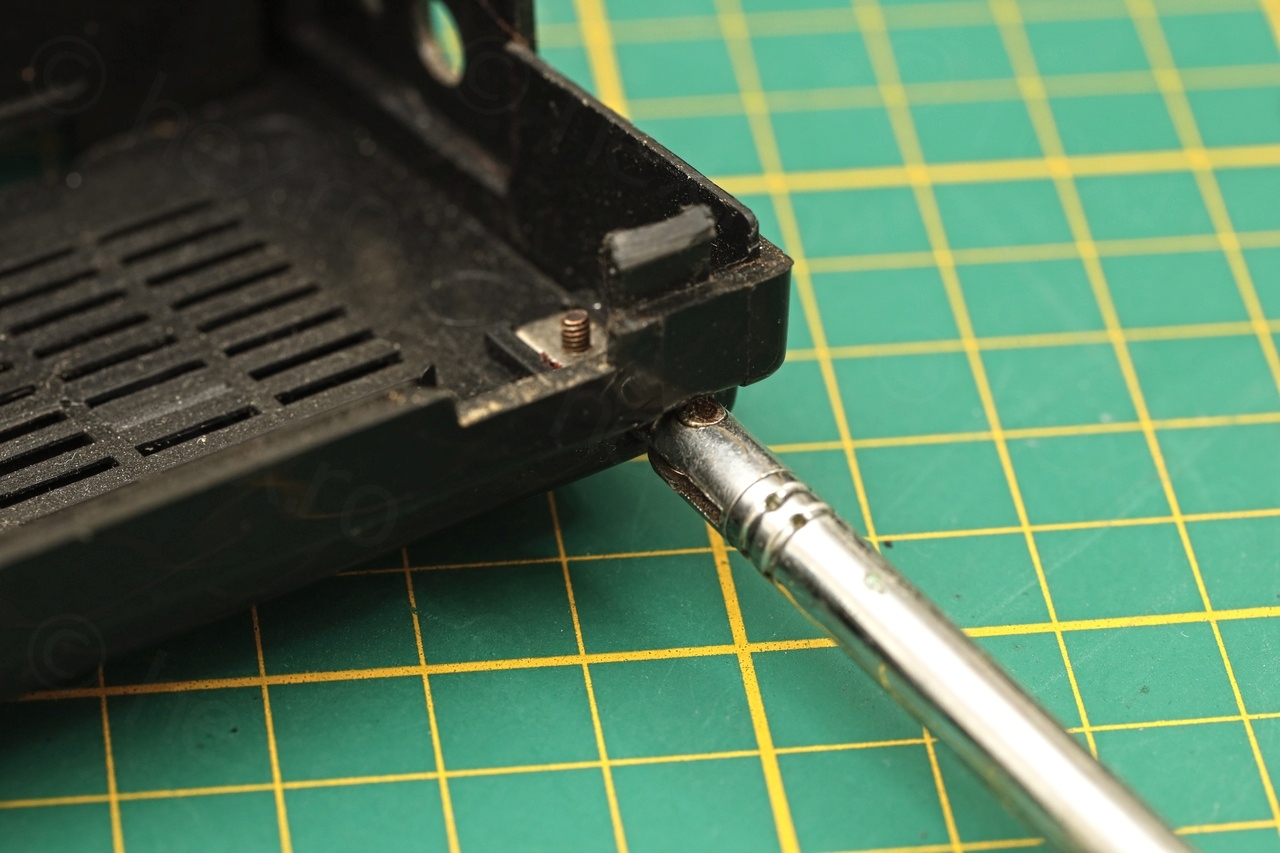
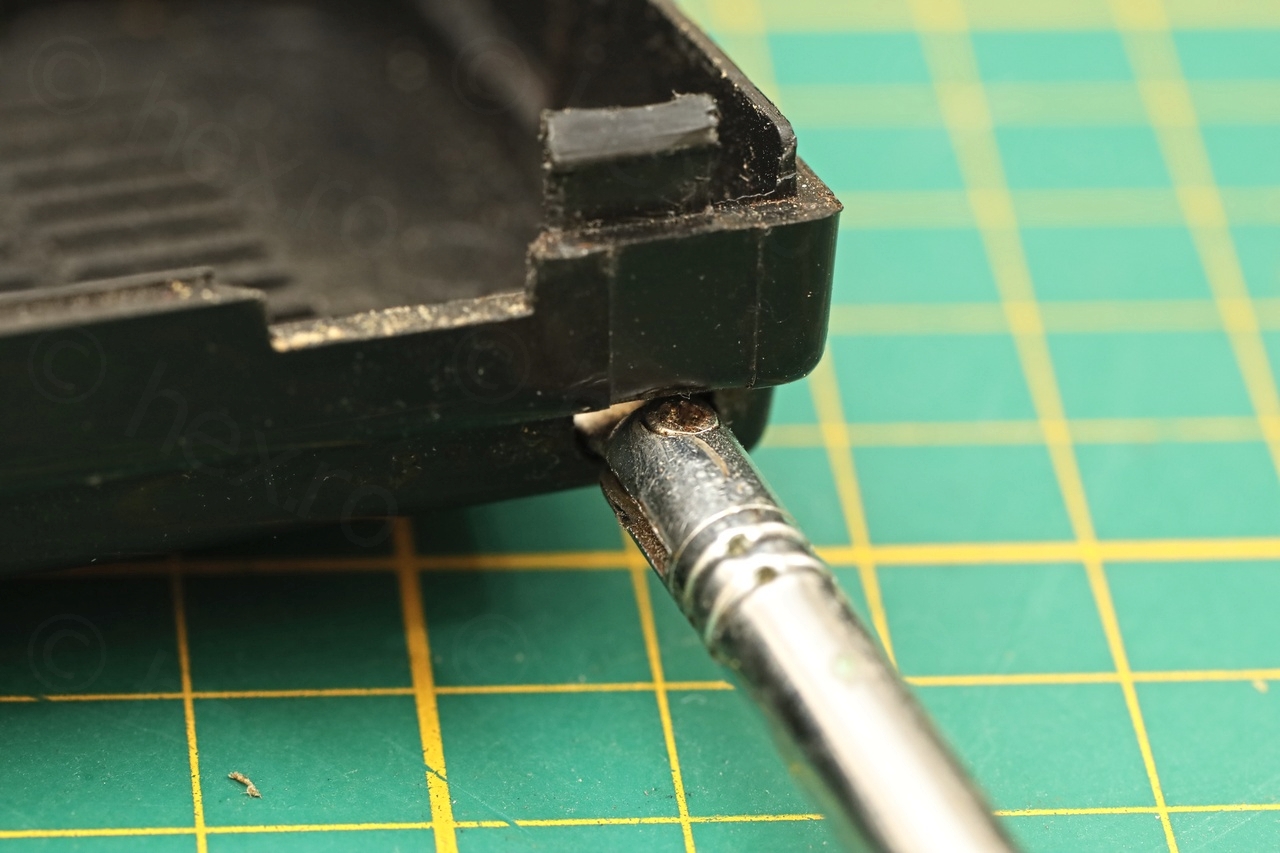
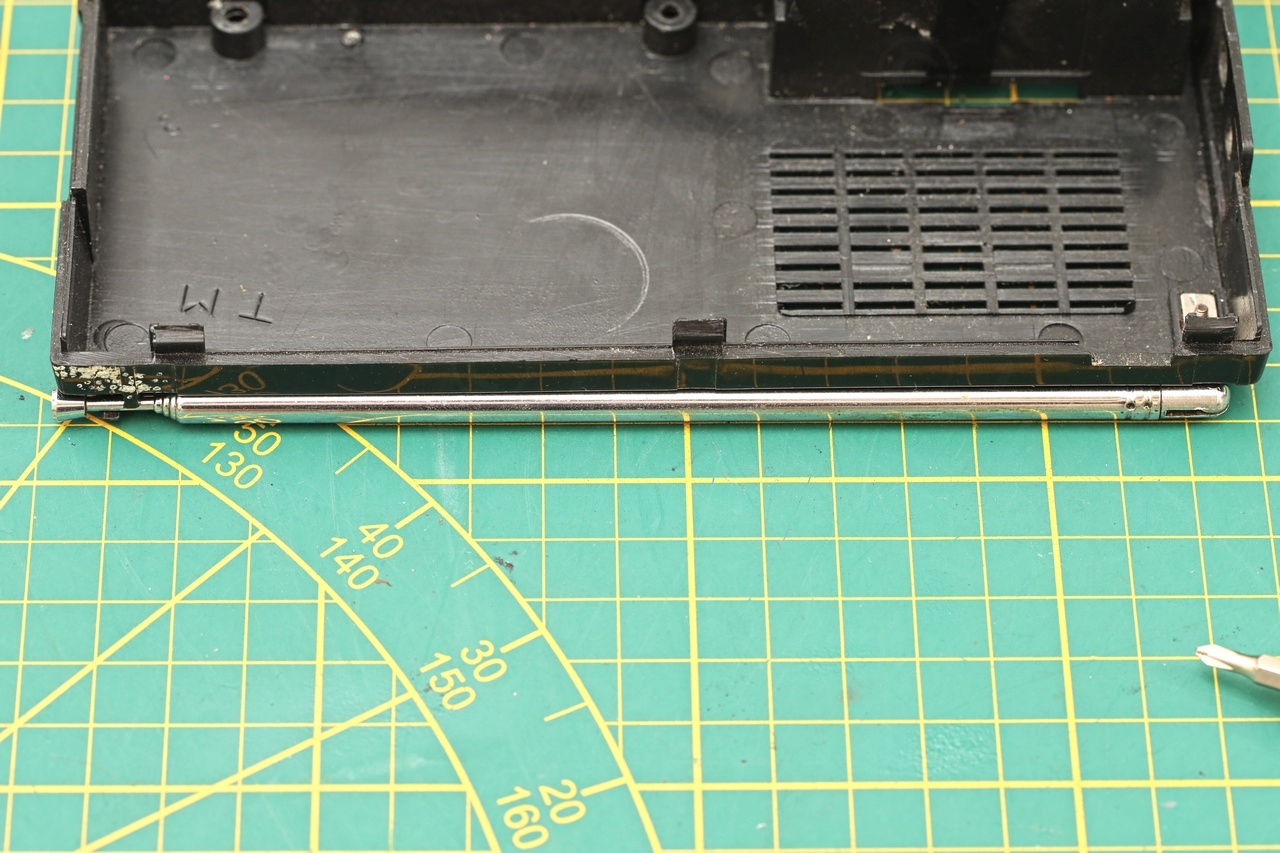
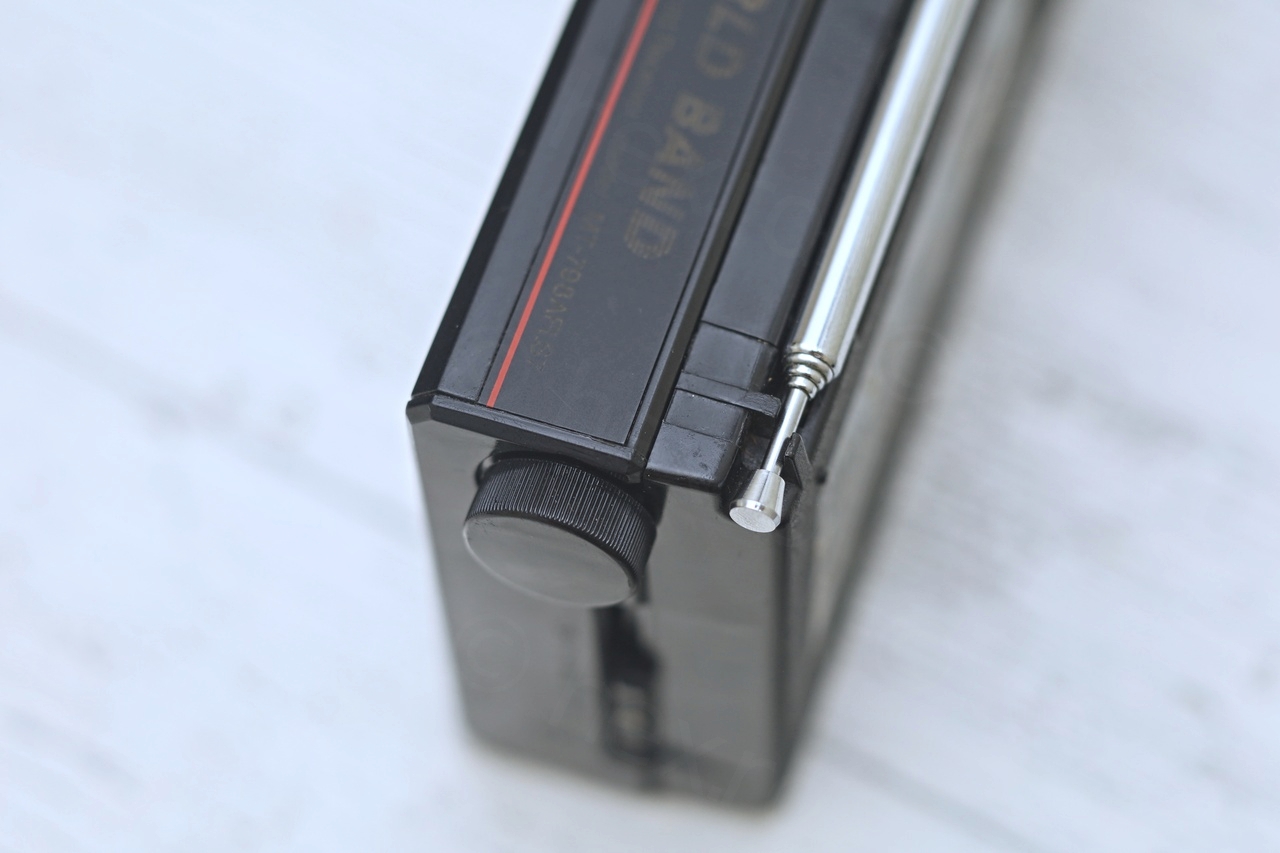
First was that the nut connecting the antenna to the circuit board was actually not affixed to the screw – the antenna was just disconnected.
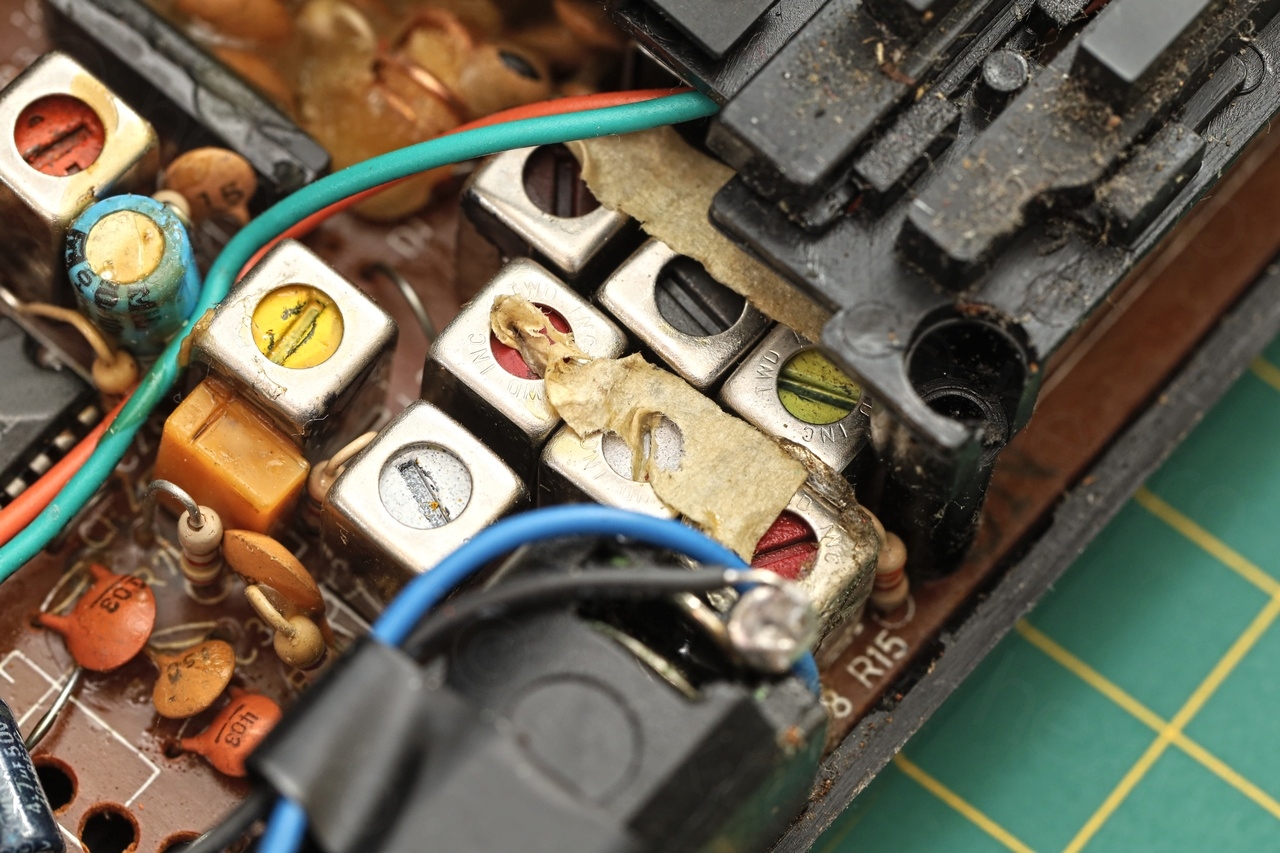
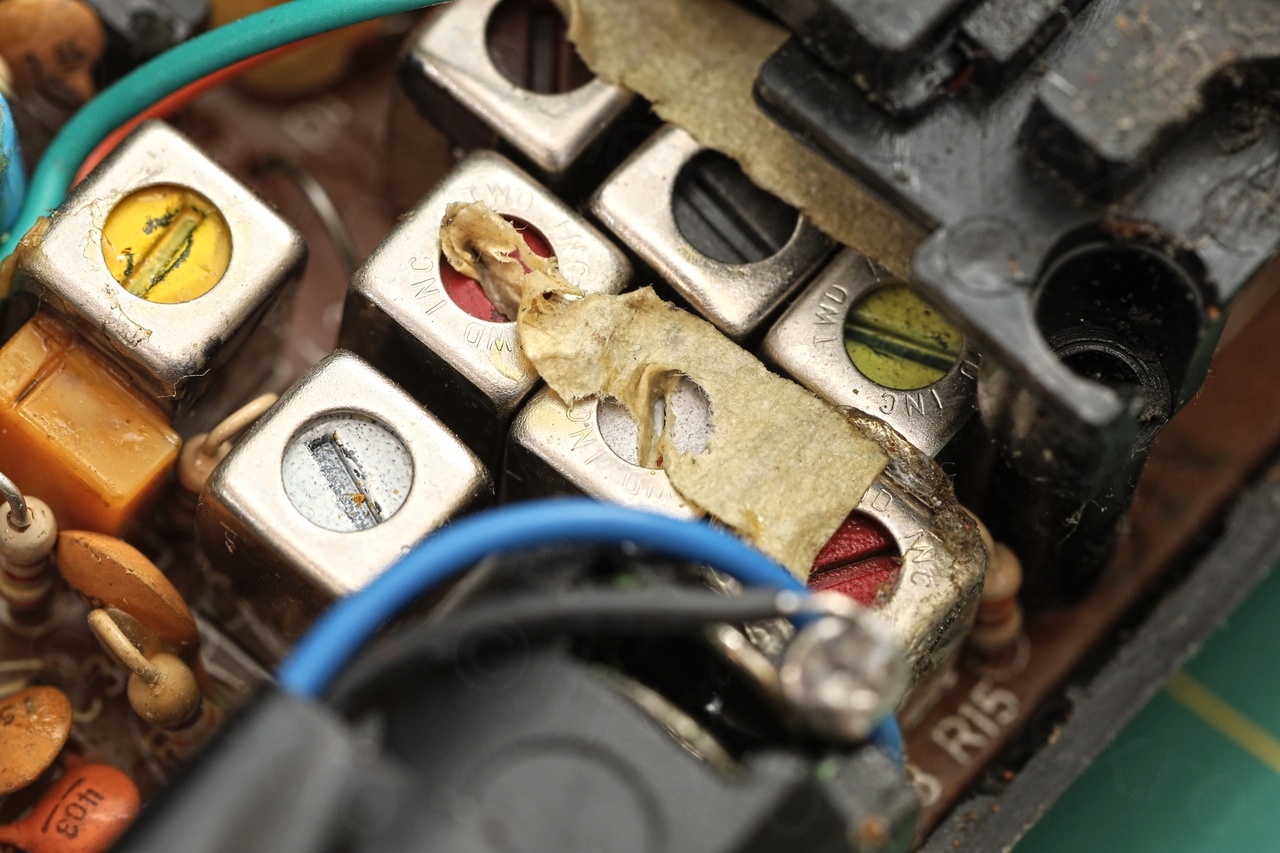
Second big problem was that there were visible signs of somebody messing up with the IF cans 🙁 as the protective tape was torn:

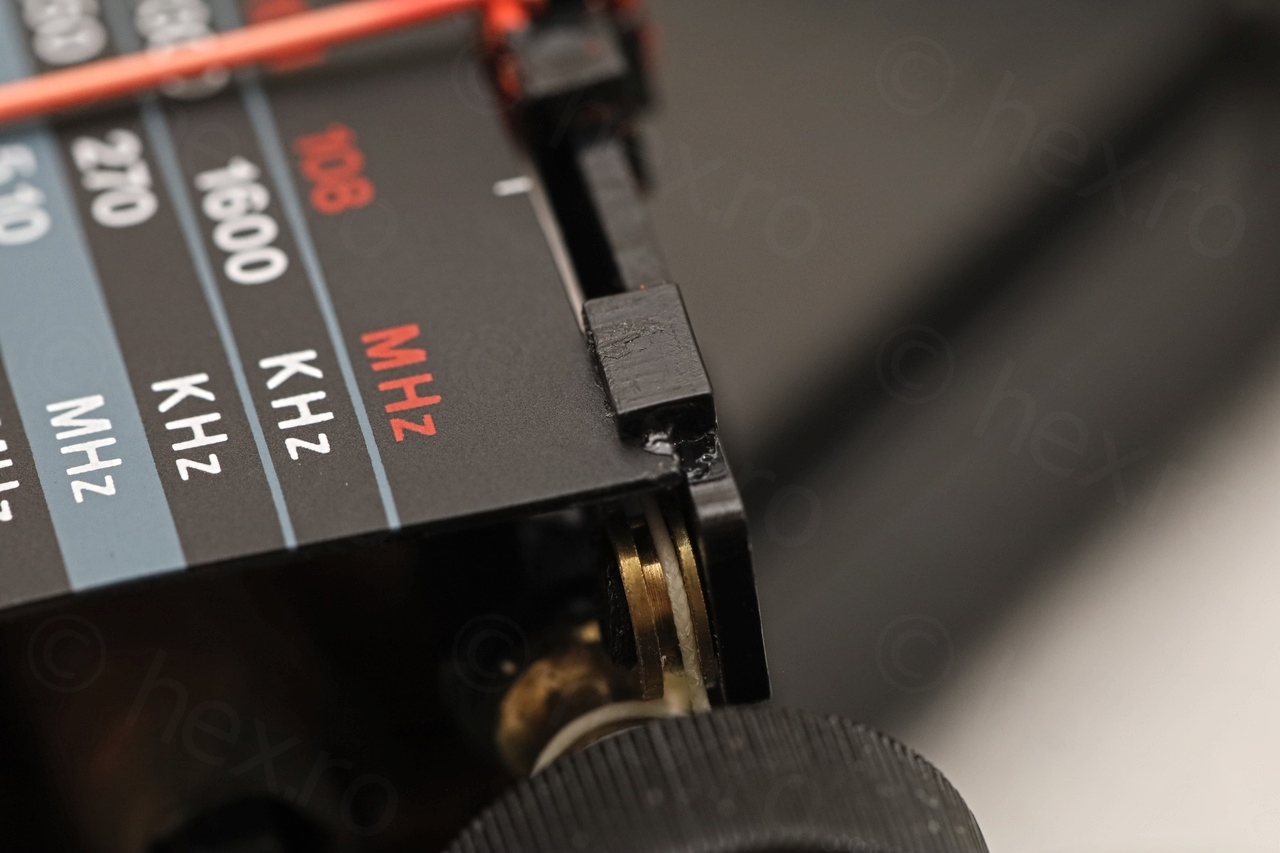
Another issue was that the antenna seemed that was not sitting properly … The screw is supposed to point to the exterior, not to the interior. Since the antenna has a thicker side that had to be on the exterior, once put back incorrectly – the only solution was to just bend the holder to get it to somehow sit.
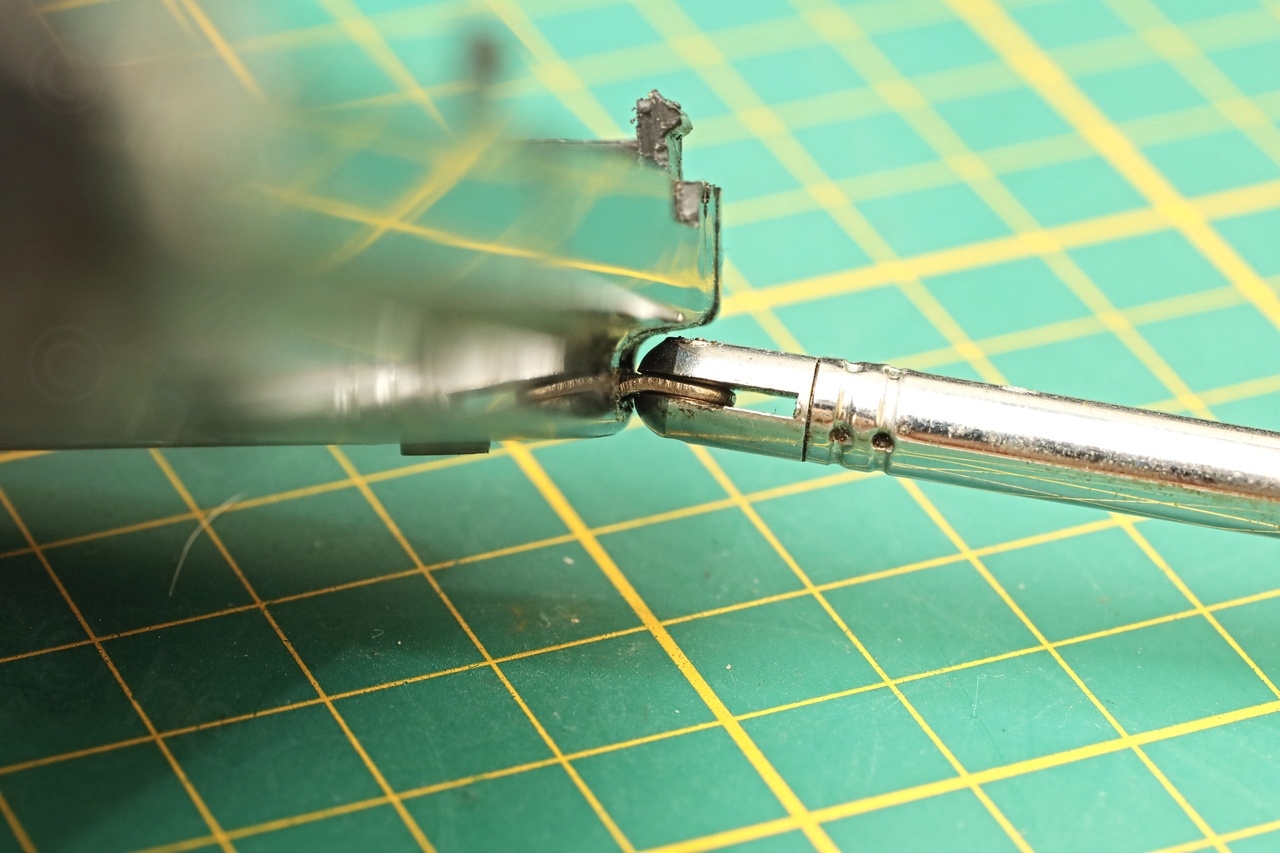
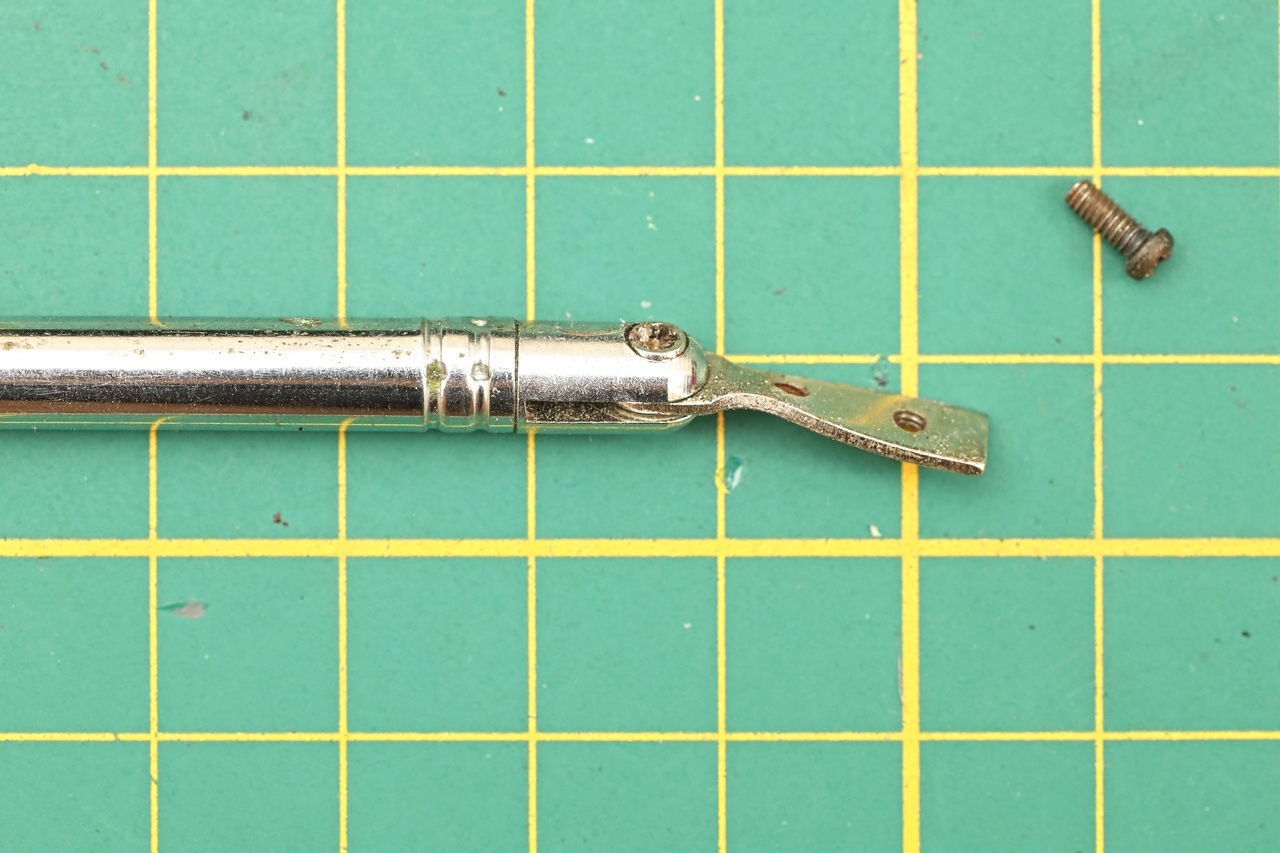
Thus, there was a lot of work ahead. Find out why it doesn’t work, realign it, then try to mend the rest.
Schematics
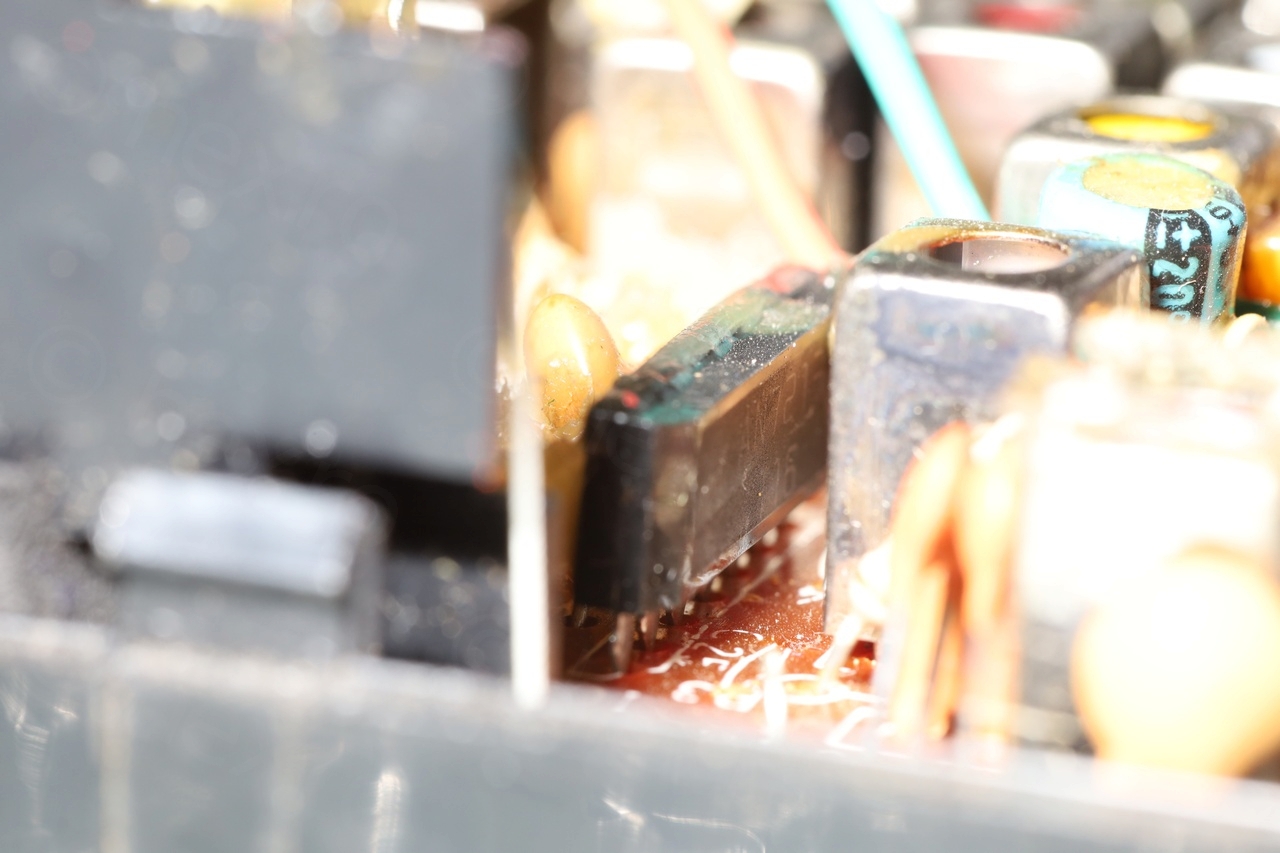
This Radio International MT-798AFLS7 uses Toshiba TA8100N and AN7123 FM frontend ICs.
It was impossible to read the markings on the second IC (too close to other components) and I had to use a Macro lens and a directional flash to try to put together the writings:

Even if the looks of the radio are of Sangean SG-792AL – this model it differs from it. The original uses a CXA1019 single IC …
Not find schematics for MT-798AFLS7, but I was able to find the Panasonic RF-542 which uses the same TA8100N IC (but has no LW nor SW bands). Also, I found the datasheets of the two ICs, as well as the schematics of the original.
The solution was to photograph the two sides of the board and using opacity, trying to align the two together without having to flip the board so many times:
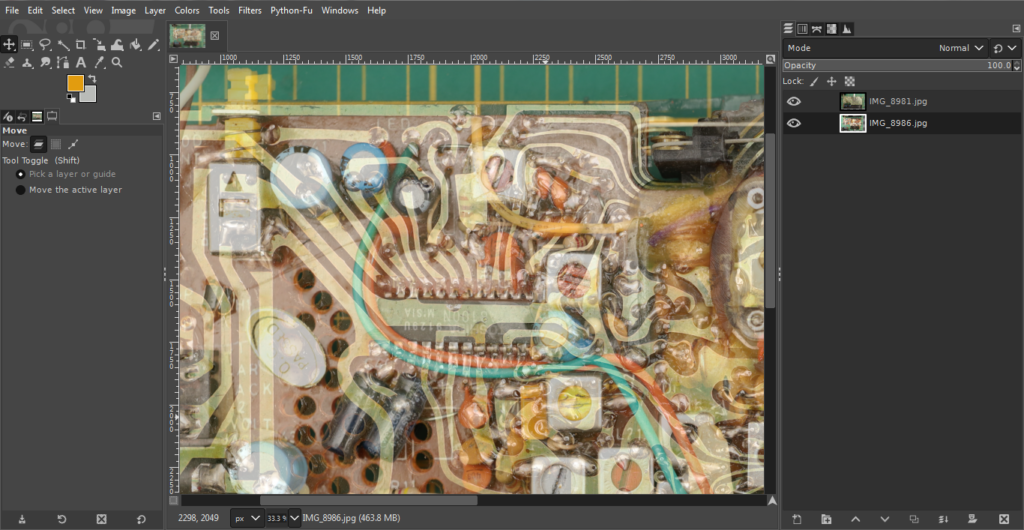
I was thus able to identify the two FM IF cans.
Fault finding
After trying to align the two FM IF cans to have a 10.7MHz pass through, the radio would still not tune right. There was a single station received (poorly) on the whole FM range! It was louder in the middle of the scale (98MHz), and it would slowly fade out towards the two ends of the scale. It was like there was a “short” on the tuning capacitor – meaning, even rotating it throughout the whole range of the FM band, it would only tune in a very specific narrow range of frequency.
I wondered if the two small variable capacitors (that were in the close proximity of the tuning cap) had anything to do with it – and when I tried to rotate the one indicated with red below, magic! FM tuning came back to life!
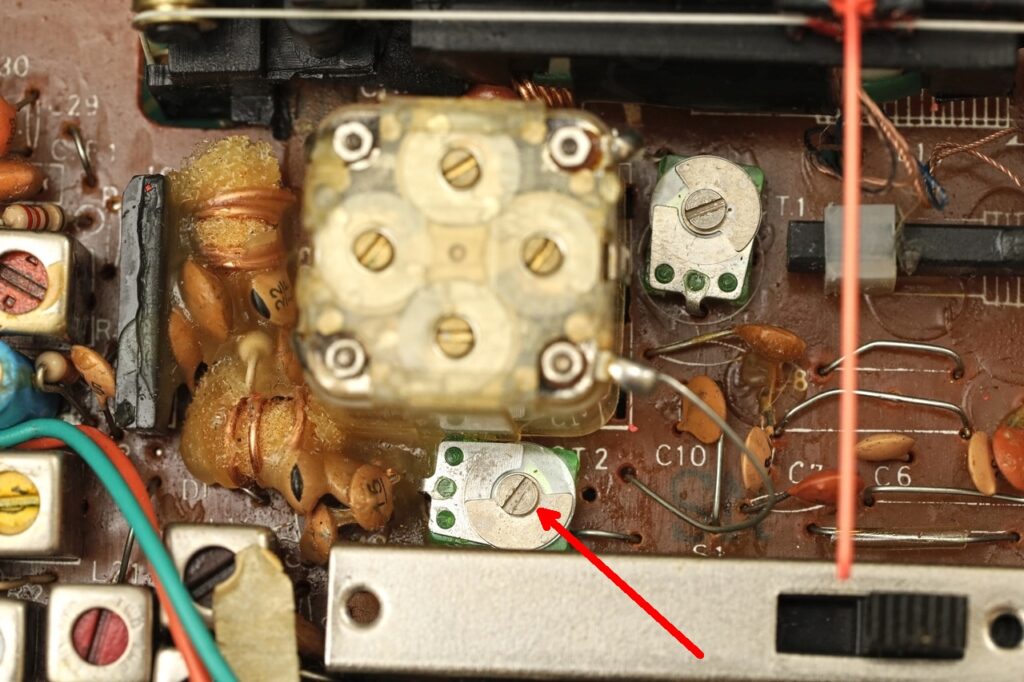
It was like there was some dirt (or corrosion) stuck inside, and just slightly rotating the capacitor made it go away. I took visual references and re-positioned the capacitor as best as I could. Radio now had selectivity.
Radio was still unaligned now, but that was just a matter of alignment – so I focused on ironing out the visual aspects.
Antenna holder fix
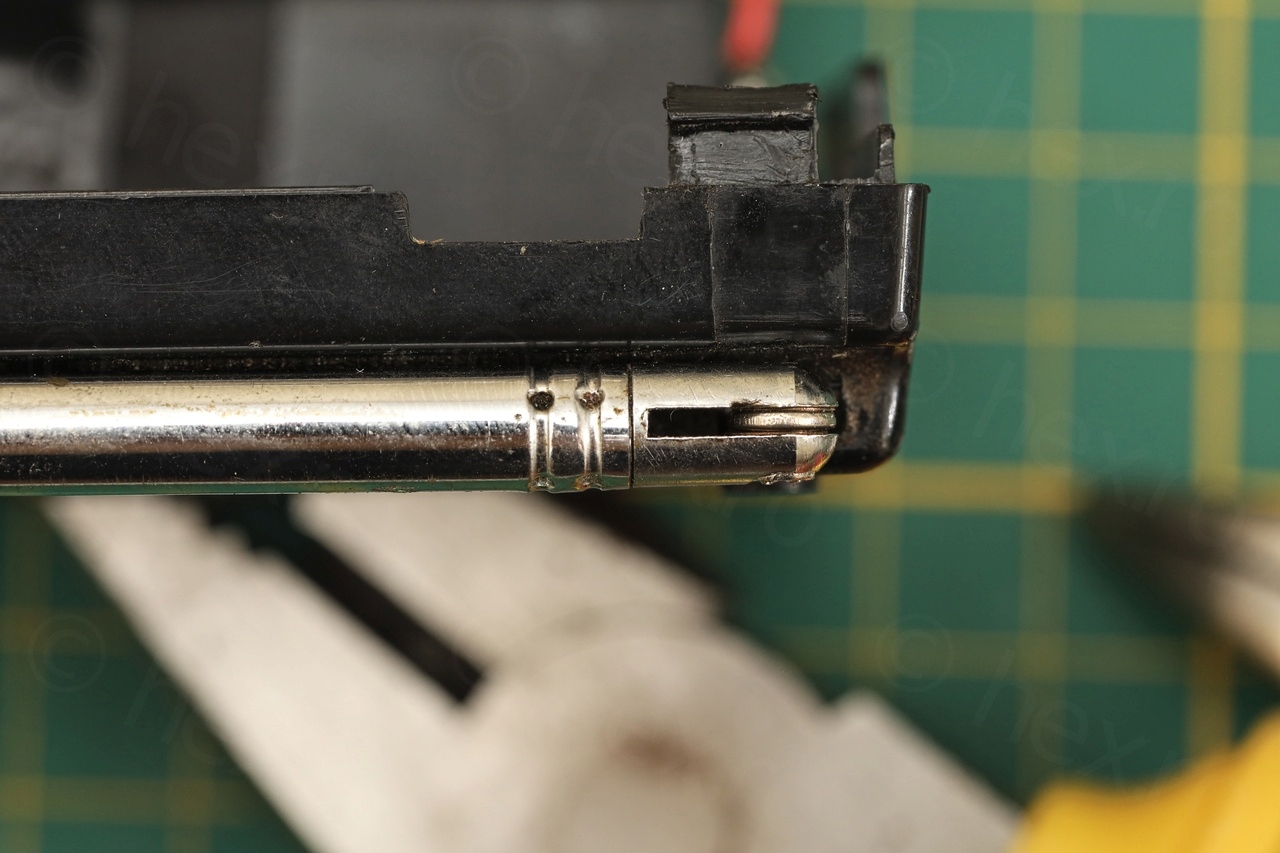
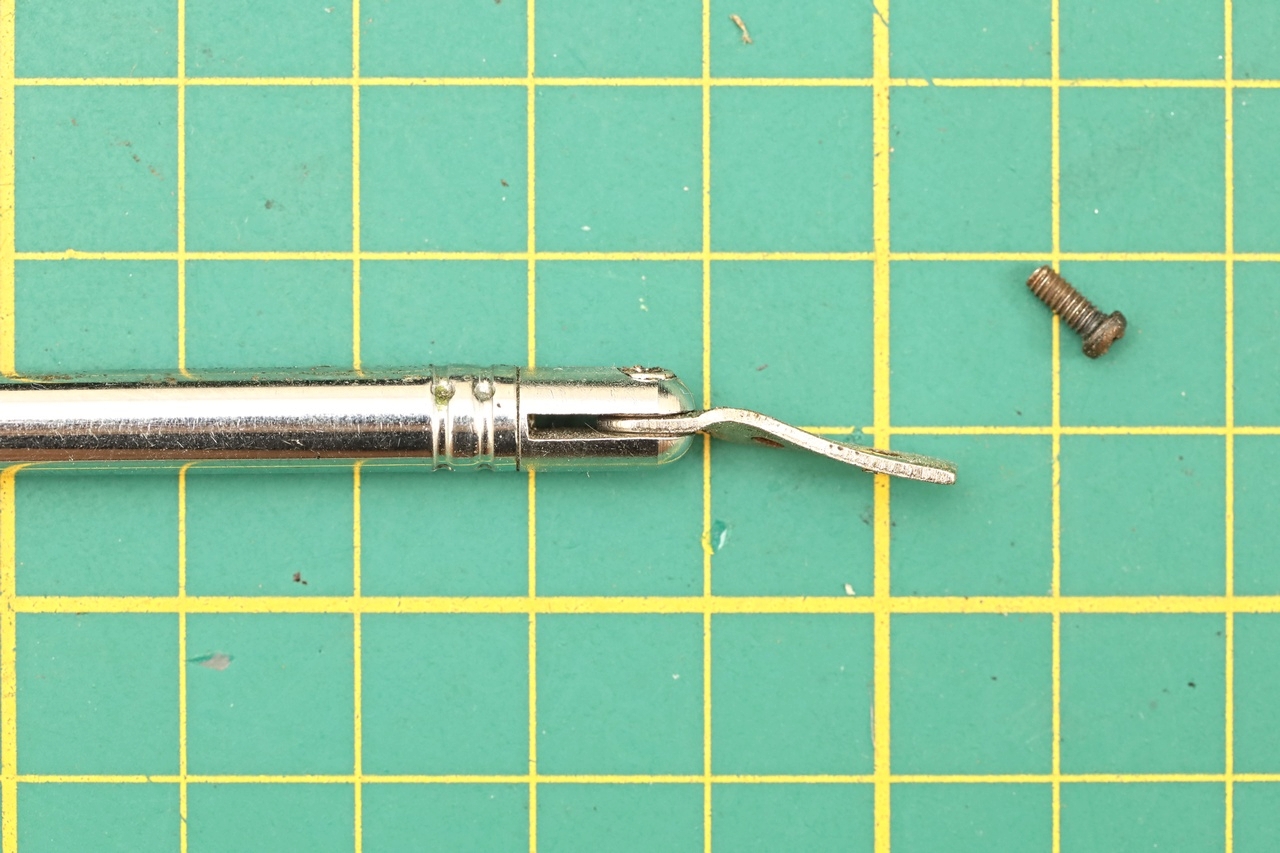
When I have reassembled the radio, I added a small drop of super glue between the antenna wire nut and the screw holding the antenna rod in place. It is strong enough to prevent the nut from unscrewing, but will break if I ever need to take it apart again.
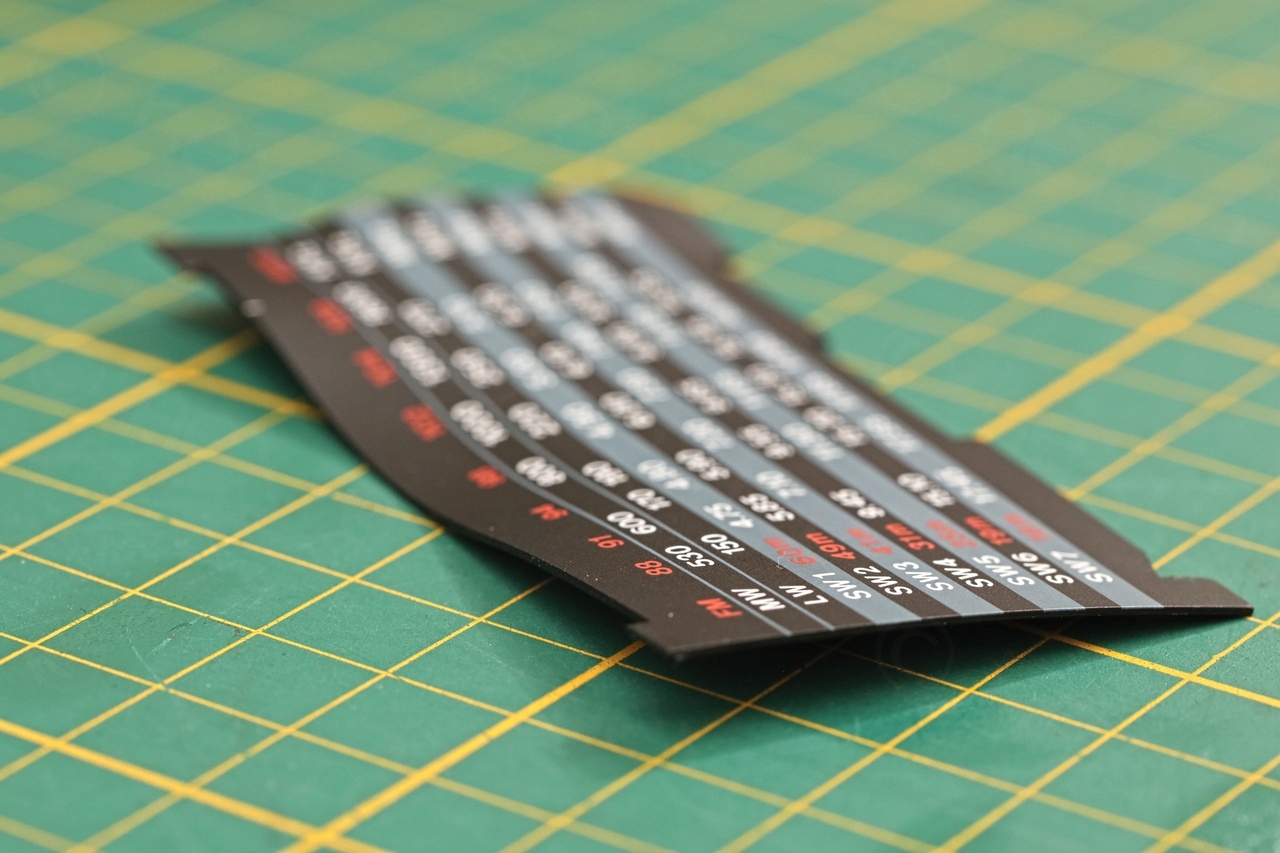
Dial scale straightening
One solution was to remodel it in Gimp and print it on a thicker paper. This would have been tedious though… Then I wondered if I could actually straighten out the plastic with some heat and make it flat – but I had no clue on what is melting temperature and to try to stay away from that point.
I cleaned thoroughly the glue remaining on the dial scale and my two sheets of glass, and I decided to use the clothes gradually, while applying heat / pressure for no more than 5-10 seconds while checking the progress. Results are impressive!
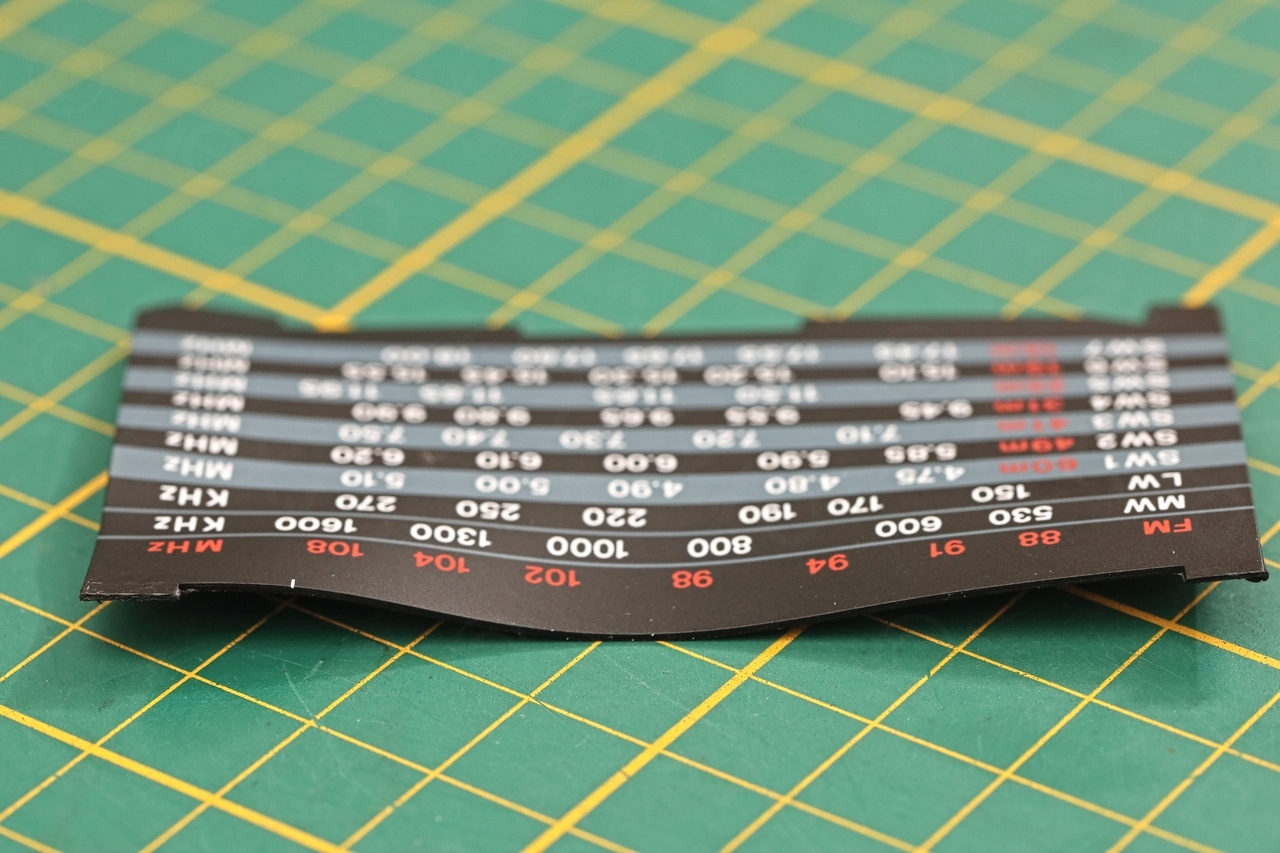

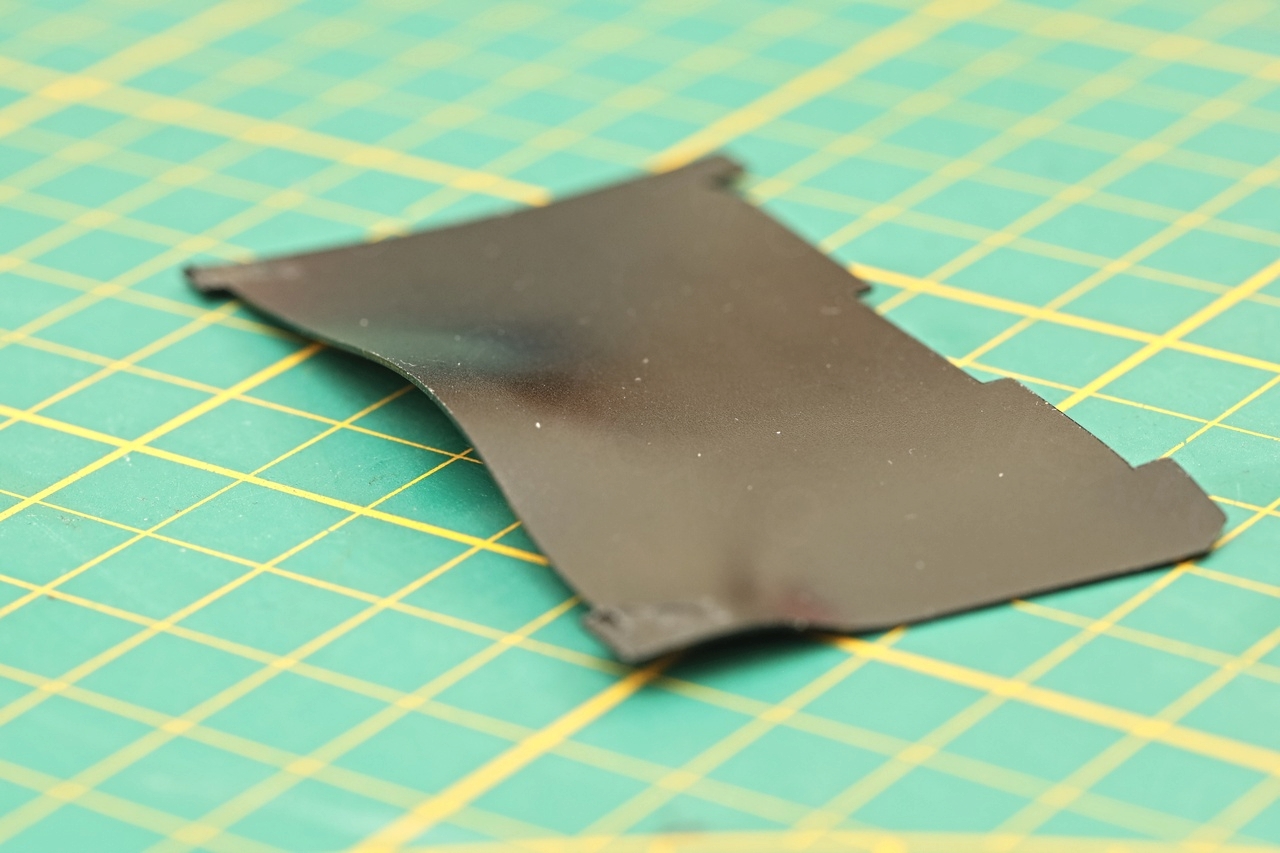
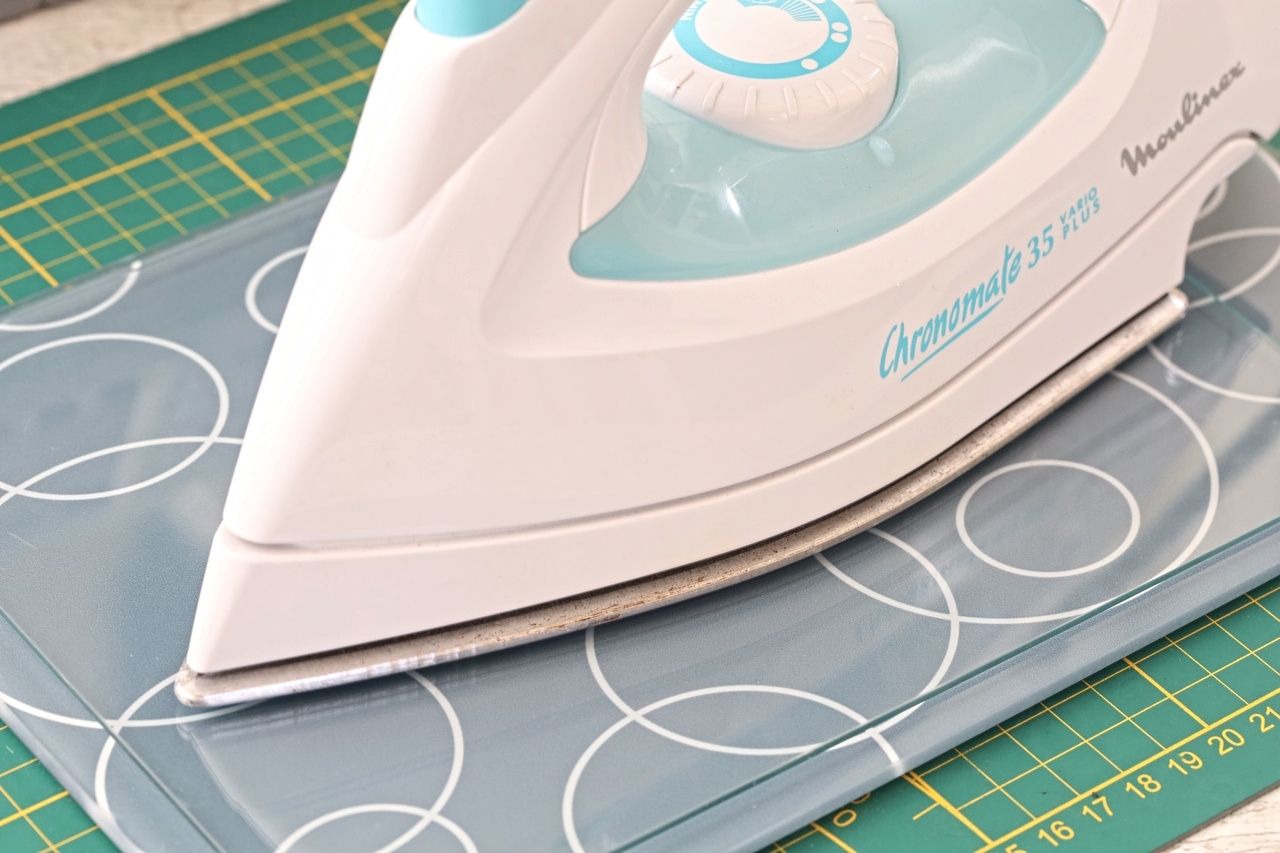

Before starting, I decided to heat from the back of the dial scale, meaning, the lettering and values would face away from the glass sheet I was applying heat to. This was a very good decision. I spotted I went a little too much when seeing that the corners on the back of the scale started to fuse a bit with the glass itself. I measured the temperature of the iron wand it was hovering around 60C.
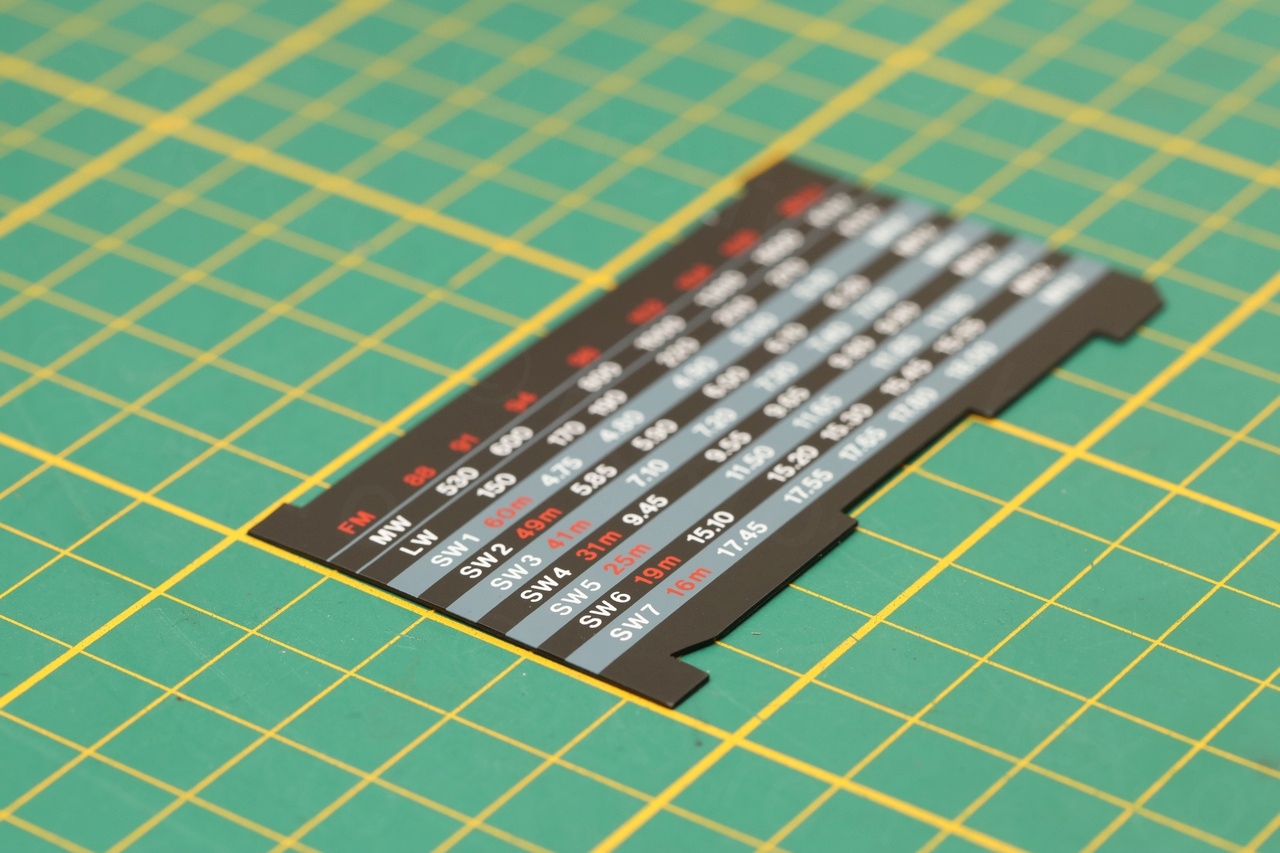
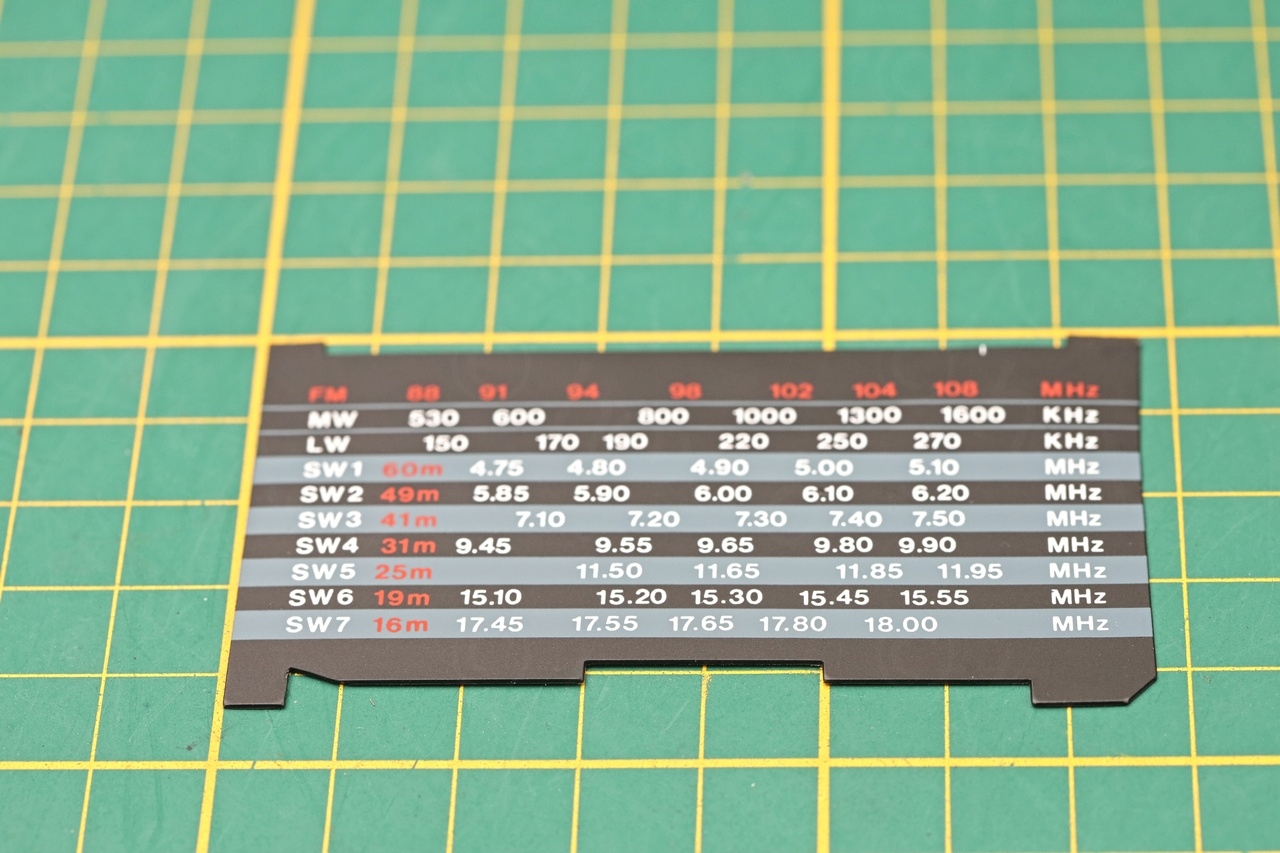
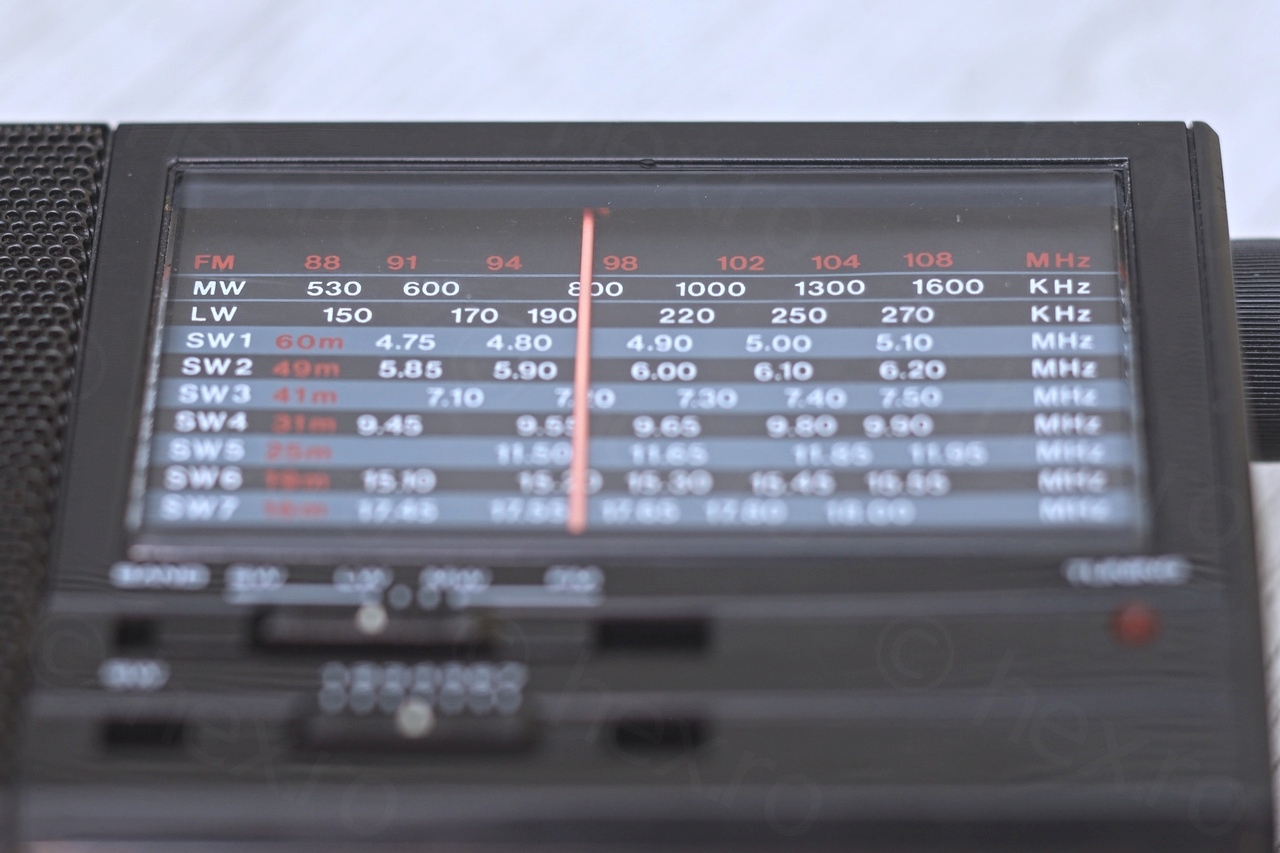
The result is that the scale is almost perfect now. It is not perfectly horizontal – meaning, the lines are slightly bent towards the MHz / kHz units, but I like it a lot. It is a testament to the poor treatment this radio had.
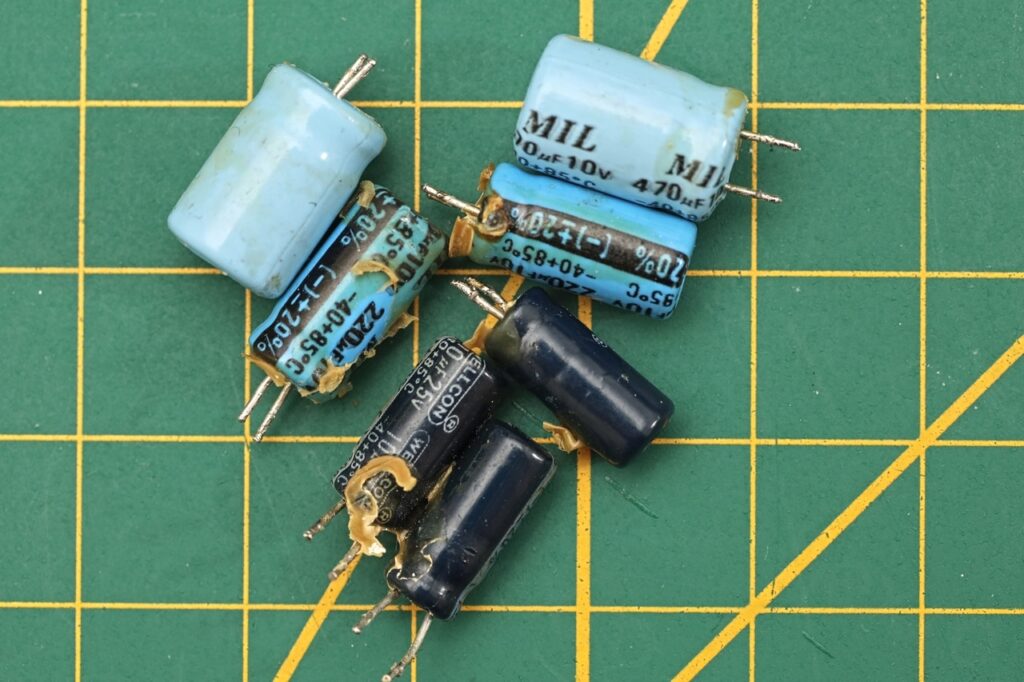
Recapping the radio
I could not measure the capacitors in circuit, as most of them were reported as “In circuit” by the meter. So if I had to de-solder one leg just to measure them, I decided it is better if I just replace them all. I figured I don’t want to realign the radio with a bad cap around just to later find out I have to recap it away.
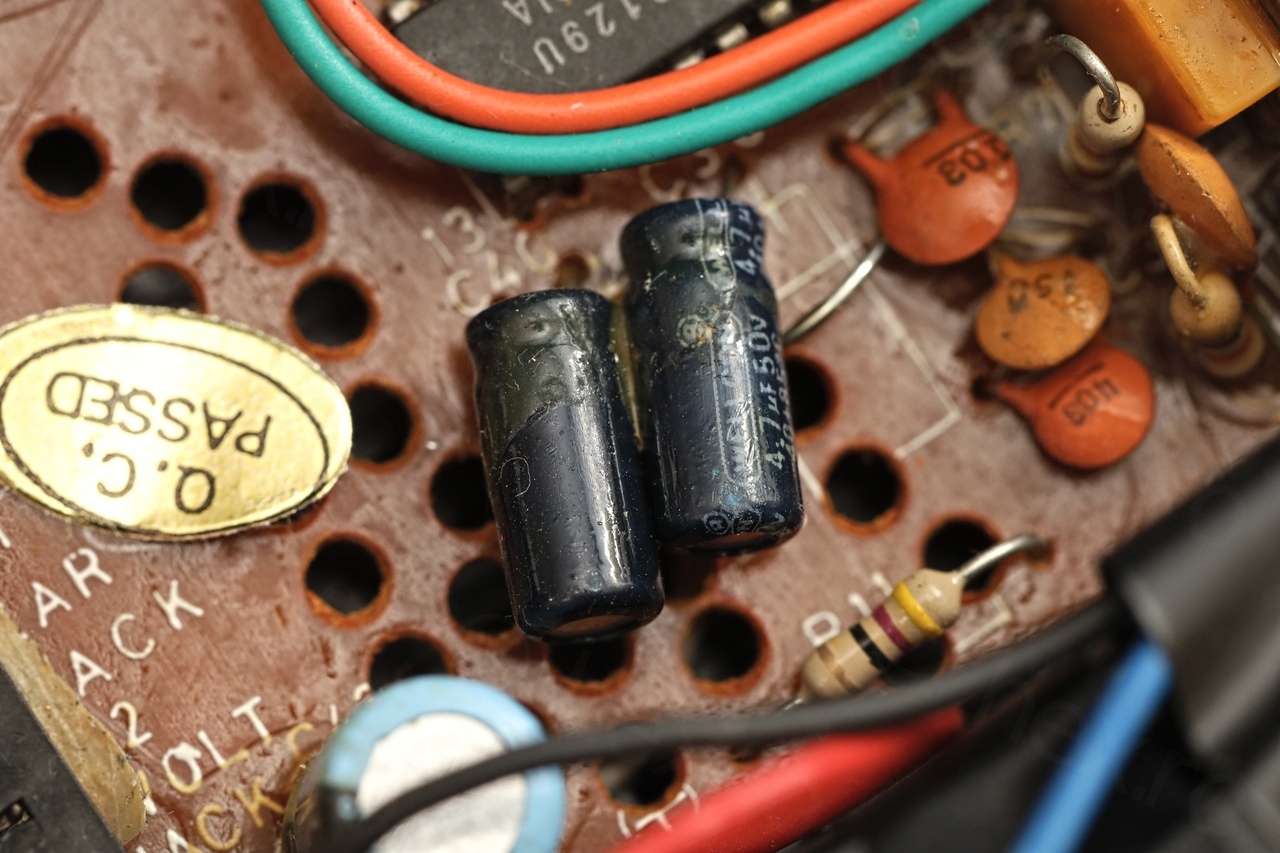
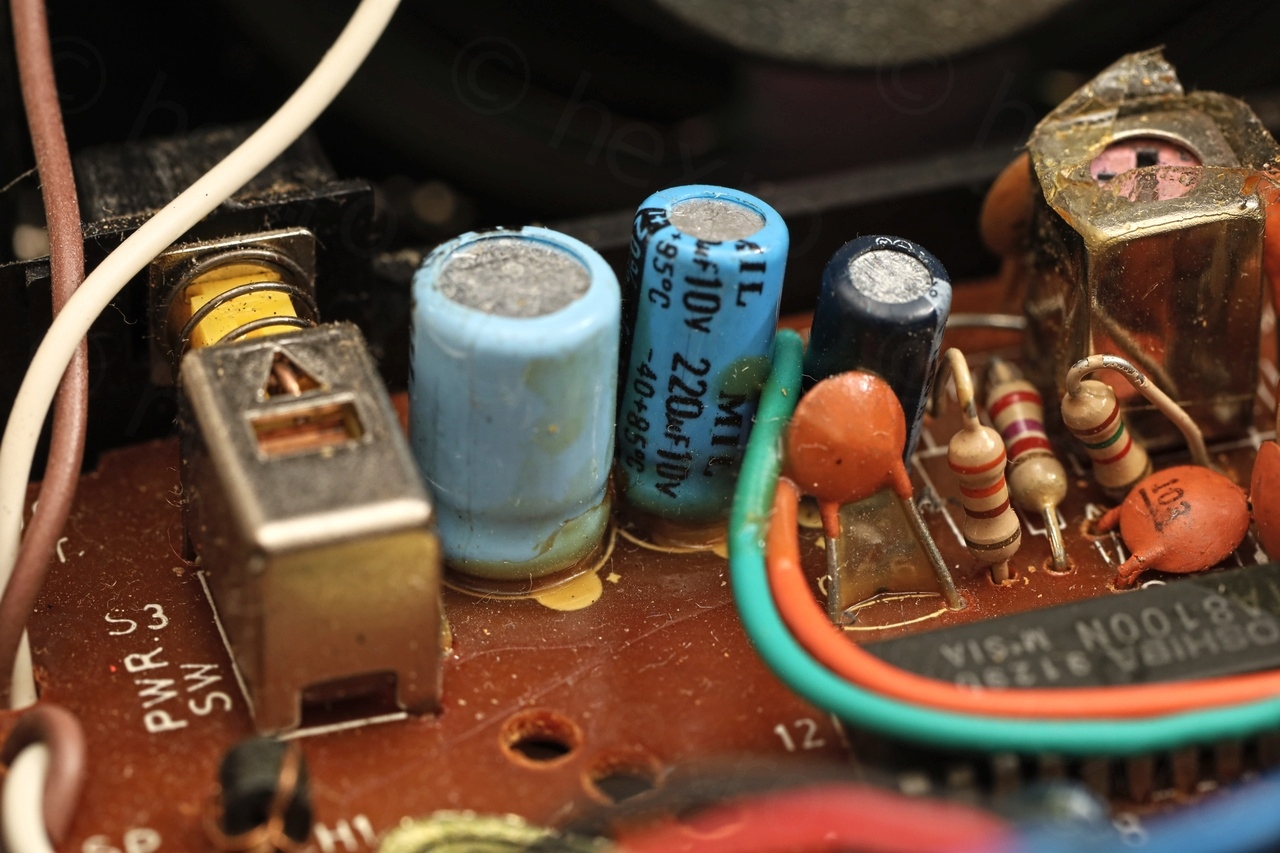

I found that the capacitors were actually good – low ESR and in spec capacity wise. The producer actually used overkill values – the radio works with 3V but the capacitors were at least rated for 10V and some of them rated for 25V. They were all glued properly to the circuit board – even if they were tiny.
Aligning the Radio
Aligning the radio was a slow process – basically, identify the IF cans that are responsible with the alignments first – second, to align it.
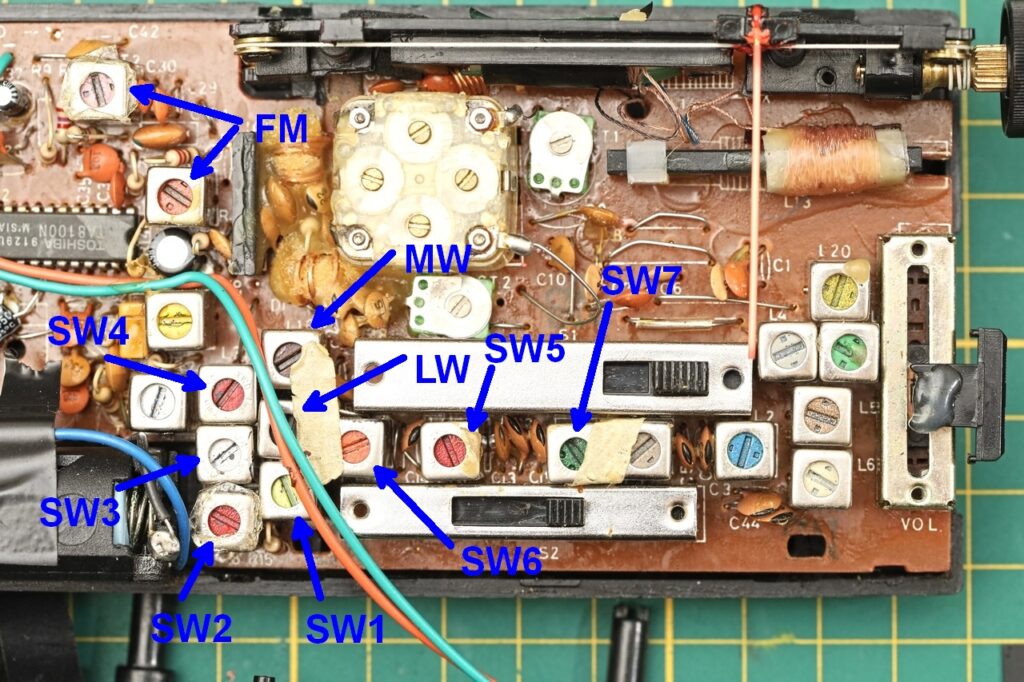
I was able to identify the two FM IF cans by following the circuit board traces, and the AM/LW/SW ones by bringing a metallic object in close proximity. I used a ceramic screw driver to do the alignment.
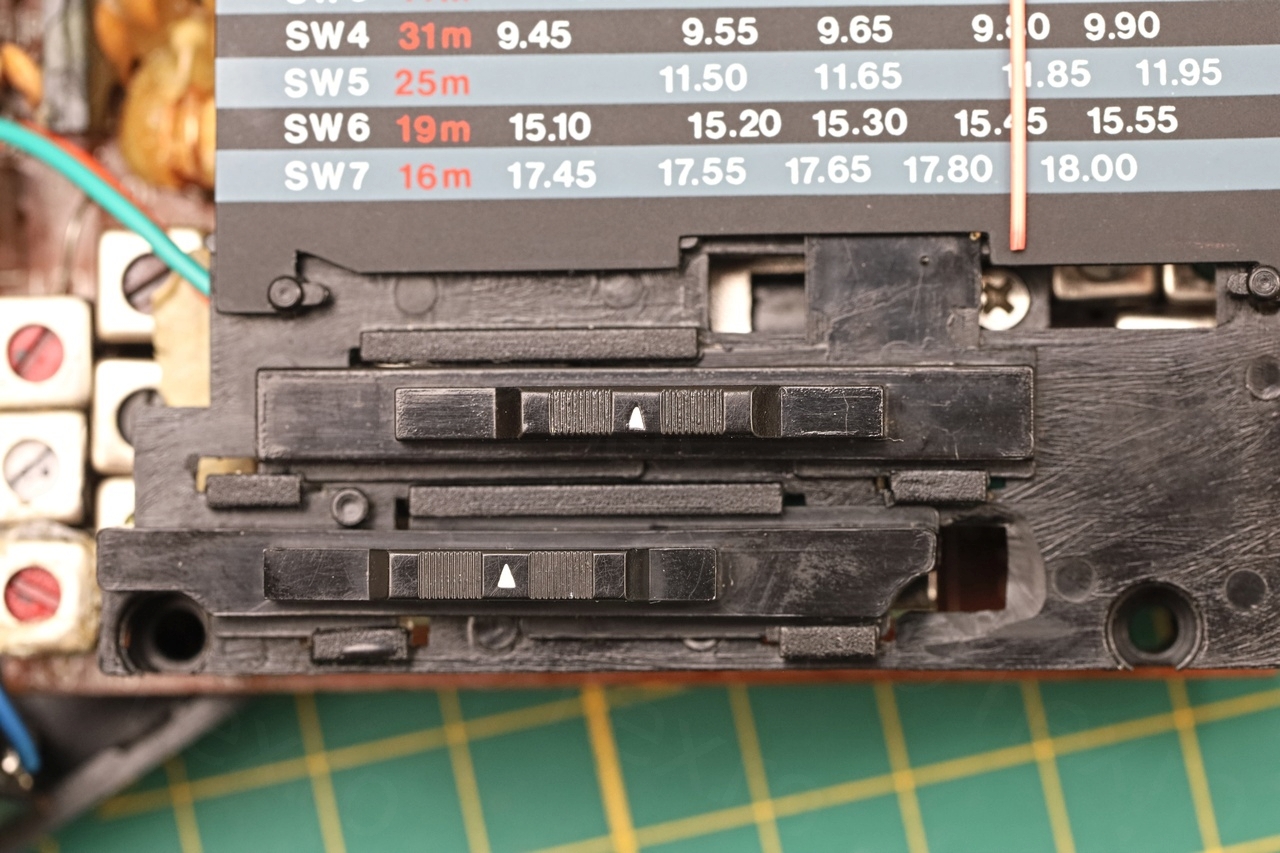
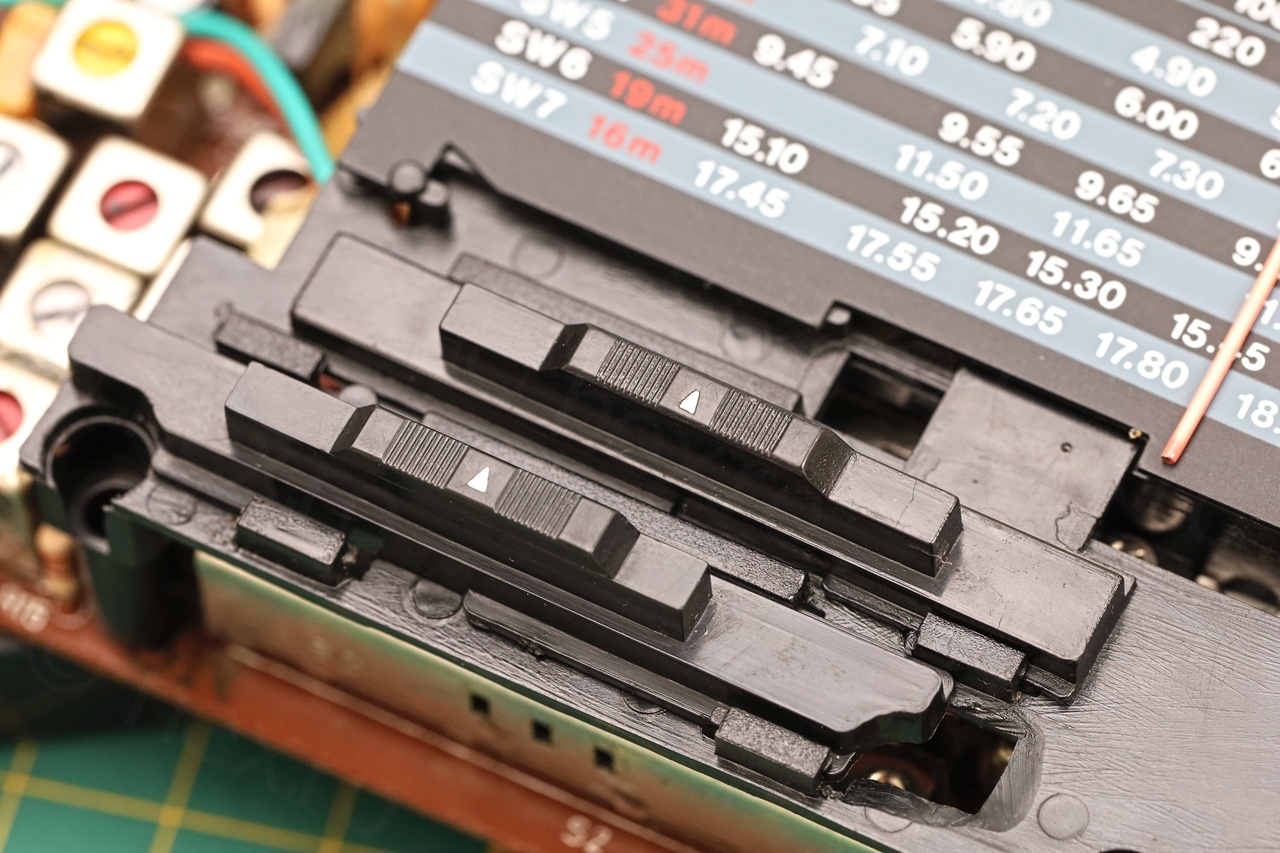
I discovered that the IF cans under the slider buttons (there is a plastic holding the slider buttons) were not touched, as the SW5, 6 and 7 bands were properly centered. I double checked that for all 10 bands, both the lowest and highest frequencies on each one are received properly by the radio.
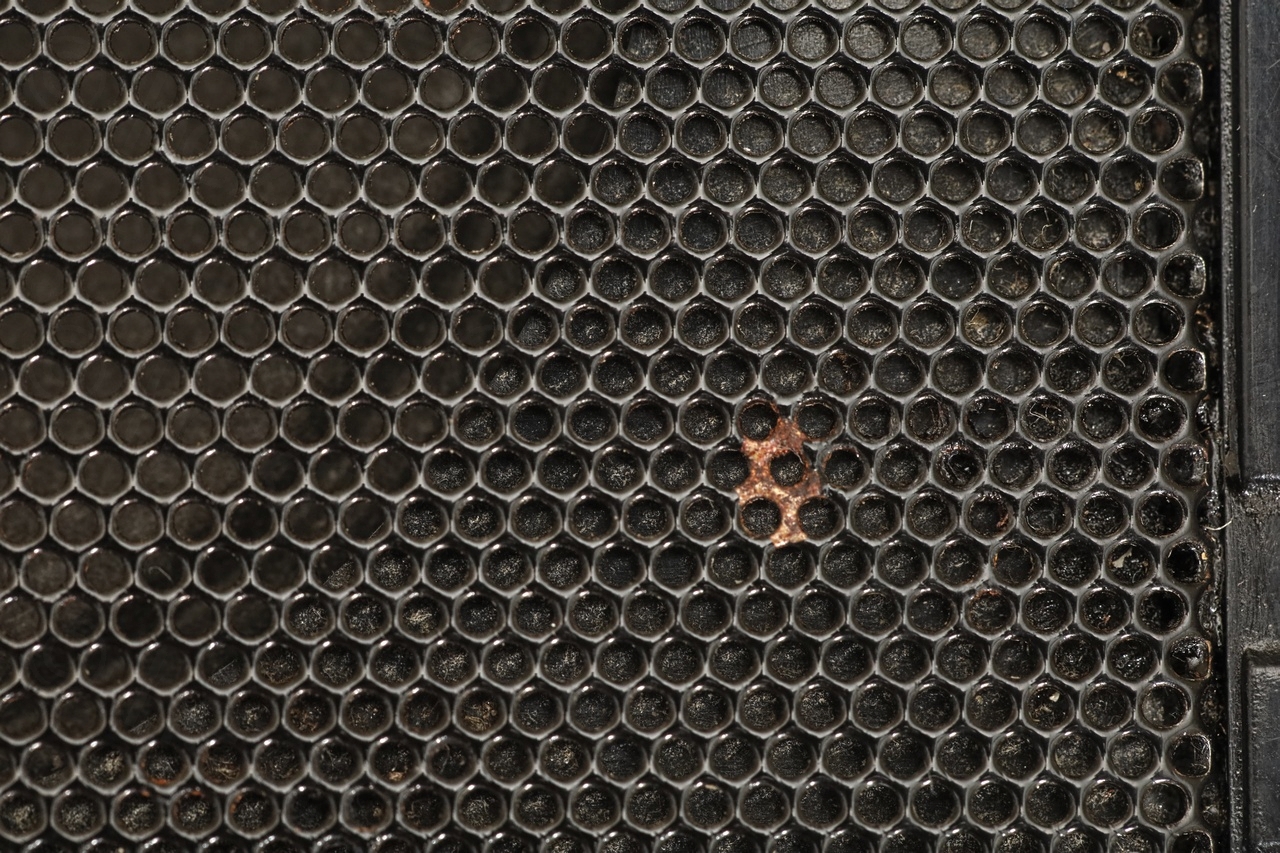
Rust on the front grill
Next step was cleaning the rust on the front grill of the speaker. I was a bit unsure how to paint such a thin surface and afraid of not covering any hole. I tried with a toothpick dipped in black paint and cleaned of surplus, and the results are good:
Other than this, I decided to clean the pots and the slider switches with copious amounts of contact cleaner. One word of advice, the SW switch cleanup influences the band alignments – so if you decide to clean it, wait at least 12h for the substance to evaporate before attempting alignment.

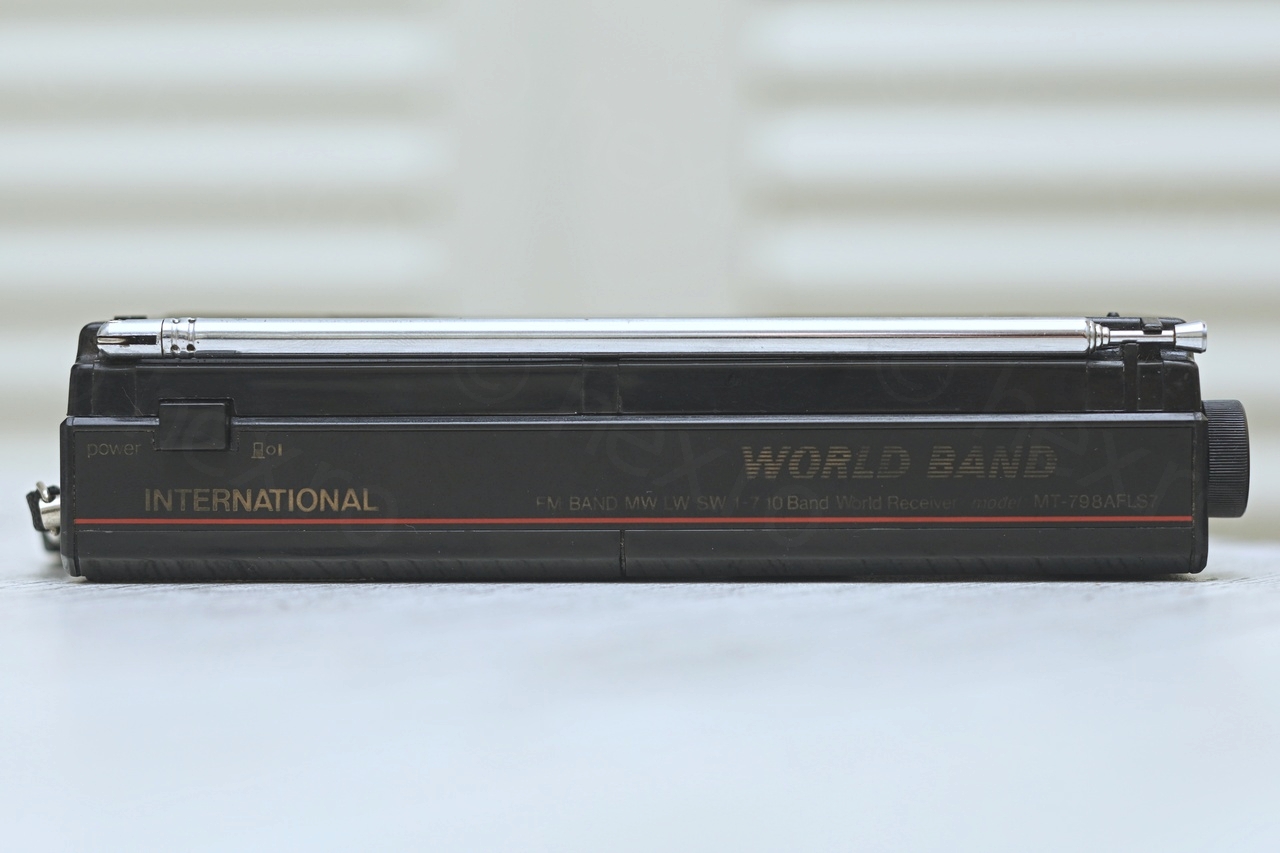
Radio now works and looks acceptable:
Radio International MT-798AFLS7 – Working
I think I was able to piece together a bit of the history of this radio: left in the Sun and getting bent and contorted, it eventually developed a fault with a small variable capacitor which caused lack of reception. A bold person tried to fix it – botching up the scale with a blob of hot glue and fiddling with random IF cans in hope of getting the reception back – but failed. Eventually it made its way to the flea market … where I was able to salvage it and get it back into running order.
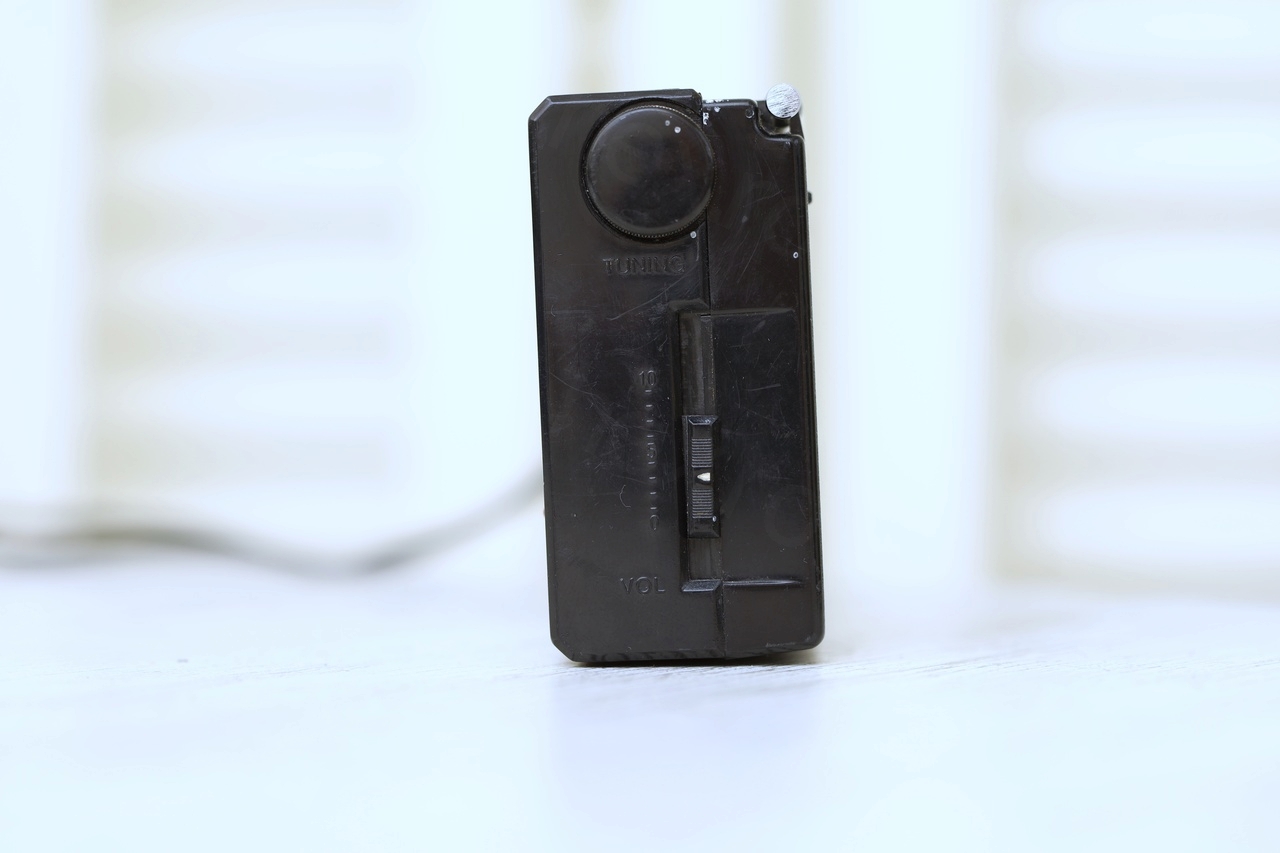
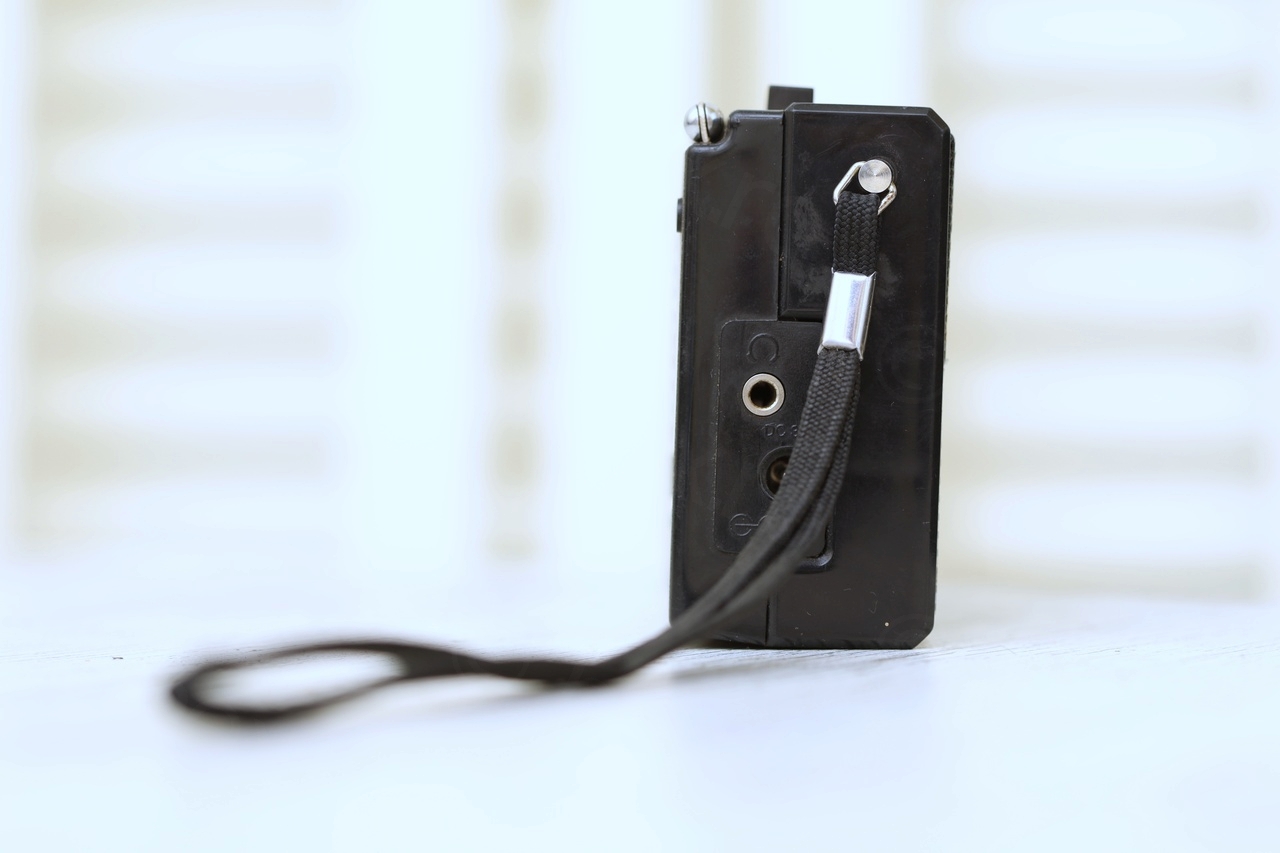
Few more “beauty” shots:
ALECU PETRICA
CATEVA FOTOGRAFII DACA SE POATE CU CONEXIUNILE DE LA BARILE DE FERITA
viulian
Am reusit sa gasesc 2 fotografii cu partea de cablaj ale radioului. Se vad firele de la bobine si unde sunt cositorite (stanga sus).
Sper sa ajute ..
Edgar Löfgren Prates
Edgar Löfgren Prates
Buna seara Viulian
Numele meu este Edgar Löfgren
Mi-a plăcut foarte mult postarea ta, pentru că am un radio asemănător cu al tău.
Este un model: MT-798 (receptor mondial cu 10 benzi – Sensibilitate ridicată)
Are două circuite integrate arse, pentru că tatăl meu l-a conectat la o sursă de 12 volți fără
a sti.
Acum voi avea ocazia sa o repar, am cautat deja mult despre radio, fara
succes pana acum, multumesc. Au trecut 17 ani de când tatăl meu a murit, i-am făcut cadou acest radio.
Dacă aveți nevoie de ceva ce este la îndemâna mea, vă stau la dispoziție.
Acum sunt pensionar, dar lucram cu reparatii electronice si in special echipamente fotografice in general. PRATES Consertos era numele atelierului meu. BRAZILIA – Rio Grande do Sul – Sant’Ana do Livramento
Mulțumesc foarte mult.
viulian
Thank you for your message, and good luck with the repair!